| “This site contains affiliate links for which OEMDTC may be compensated” |
| REAR QUARTER PANEL WHEEL WELL LIP CORROSION AND/OR PERFORATION |
ISSUE:
Some 2009-2012 Escape and 2009-2011 Mariner vehicles may exhibit rear quarter panel(s) with corrosion and/or perforation around the wheel well lip area.
ACTION:
Follow the Service Procedure steps to correct the condition.
SERVICE PROCEDURE
Passenger side shown, the procedure is the same for the drivers side.
- Disconnect the negative battery cable. Refer to Workshop Manual (WSM), Section 414-01.
- Remove the rear bumper cover. Refer to WSM, Section 501-19.
- Remove the rear lamp assembly.
- Remove the wheel and tire. Refer to WSM, Section 204-04.
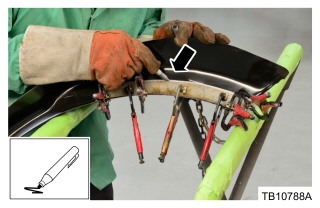
- Use a marker and trace a line 13 mm (1/2″) beyond the corrosion area of the outer quarter panel. (Figure 1)
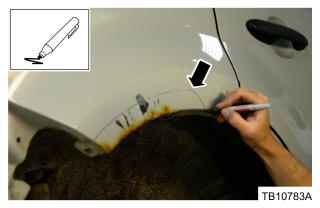
Figure 1
- Use a spot weld drill bit and drill out the spot welds on the quarter panel wheel lip edge.
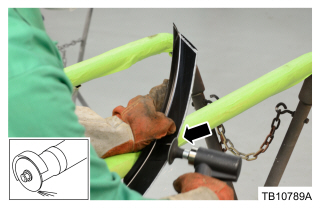
- Use a cut off wheel and carefully cut the outer panel following the line traced. Remove the outer panel.
- Do not discard the outer panel as it may be used later to make the new patch.
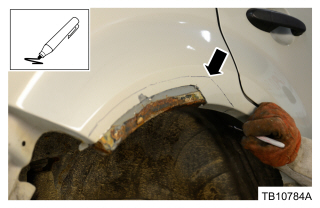
- Inspect the inner panel for corrosion. If any inner panel corrosion extends beyond the initial cut performed on the outer panel, trace another line on the outer panel beyond the corrosion area of the inner panel. (Figure 2)
- Use a cutoff wheel and carefully cut the outer panel. Remove the outer panel.
- Do not discard the outer panel as it will be used later to make the new patch.
Figure 2
- Use a cutoff wheel and cut the inner panel slightly beyond the corroded area.
- Do not discard the inner panel as it will be used later to make the new patch.
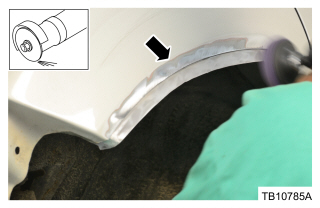
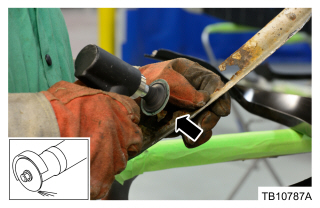
- Prepare the area for welding by grinding and cleaning the inner and outer panels. (Figure 3)
Figure 3
- Wipe areas clean with isopropyl alcohol and a clean cloth.
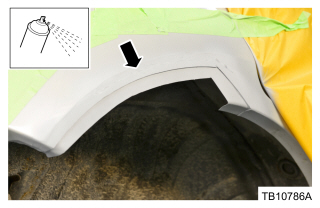
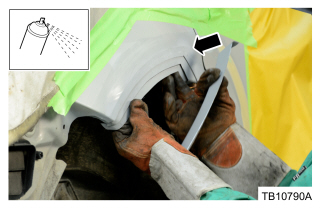
- Apply 3M Weld-Thru Coating II or equivalent and allow to dry. (Figure 4)
Figure 4
- Use the sections of the inner and outer panels previously removed, carefully grind smooth the outer edges. (Figure 5)
Figure 5
- Clamp the cutout inner panel section onto the new inner patch panel.
- Using a marker, trace the outline of the cutoff panel section onto the new panel. (Figure 6)
Figure 6
- Repeat Steps 14 and 15 for the outer panel section(s).
- Use an air saw or equivalent, cut along the trace line for both inner and outer panels.
- Lightly grind smooth the outer edges of both cut panels. (Figure 7)
Figure 7
- Sand off e-coat from the edges of both new panels and clean with isopropyl alcohol.
- Apply 3M Weld-Thru II Coating or equivalent to both sides of the new patch panels and allow to dry.
- Use the remainder of the new inner patch panel, cut a 19 mm (3/4″) wide backer patch.
- Lightly grind outer edges of the backer patch panel and clean with isopropyl alcohol.
- Apply 3M Weld-Thru II Coating or equivalent to both sides of the backer patch panel.
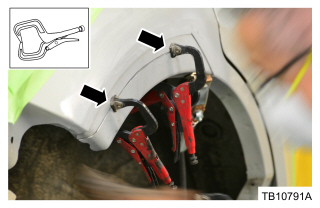
- Clamp the backer patch panel and inner patch panel onto the inner quarter panel. (Figures 8 and 9)
Figure 8
Figure 9
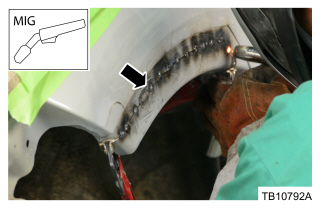
- Use a MIG welder and stitch weld the inner patch panel onto the inner quarter panel. (Figure 10)
Figure 10
- Grind smooth the stitch welds and clean the area with isopropyl alcohol.
- Apply 3M Weld-Thru II Coating or equivalent and allow to dry.
- Clamp the outer patch panel onto the quarter panel.
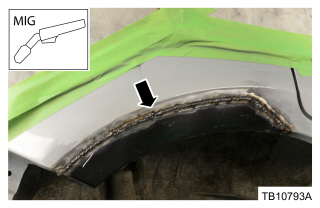
- Use a MIG welder and stitch weld the patch panel onto the quarter panel. (Figure 11)
Figure 11
- Grind smooth the stitch weld area and clean with isopropyl alcohol.
- Apply fiberglass reinforced body filler on the repair area.
- Sand and shape the fiberglass filler as required.
- Apply conventional body filler.
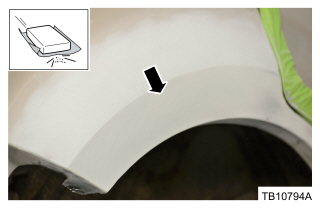
- Sand and shape as required for final finish. (Figure 12)
Figure 12
- Prime and paint quarter panel as necessary.
- Apply ValuGard Rust Preventive or equivalent to the backside of inner quarter panel.
Use Customer Concern Code (CCC) F25 when submitting for warranty payment.
| Obtain Locally | |
| Part Number | Part Description |
|---|---|
| 05917 | 3M Weld-Thru II Coating |
| VG101 | ValuGard Rust Preventive |
| Isopropyl Alcohol | |
| Fiberglass Reinforced Body Filler | |
| Body Filler | |
| 8L8Z-7827790-A | Inner Patch Panel – Passenger Side |
| 8L8Z-7827791-A | Inner Patch Panel – Driver Side |
| 8L8Z-7827846-A | Outer Patch Panel – Passenger Side |
| 8L8Z-7827847-A | Outer Patch Panel – Driver Side |
 :
:


Nope. Because god forbid Ford accept responsibility for their manufacturing mistakes. They mess up, we (the customer) have to pay for it. Will never buy another Ford ever, Garbage vehicles.
right and left rear wheel quaters have rot
I have a 2010 Ford Escape with rust on the top of the rear wheel on the drivers side. I keep my car parked in a garage when at home. I noticed the rust about four years ago and it continues to get worse. Due to the many issues with people complaining about the rust, will this be repaired with no cost to the customer? Thank you
John Miller
I have a 2012 Ford Escape with rust on the top of the rear wheel well on the passenger side. About two years ago and it continues to get worse. Due to the many issues with people complaining about the rust, will this be repaired with no cost to the customer? Thank you
Most likely not.