| “This site contains affiliate links for which OEMDTC may be compensated” |
| TECHNICAL SERVICE BULLETIN Front Door Trim Panels Delaminating | 17-2222 08 November 2017 |
Model:
Ford 2013-2016 Police Interceptor |
| 2013-2016 Explorer |
Issue: Some 2013-2016 Explorer/Police Interceptor Utility vehicles may exhibit delamination of the top edge of the front door trim panels.
Action: Follow the Service Procedure steps to correct the condition.
Warranty Status: Eligible Under Provisions Of New Vehicle Limited Warranty Coverage Warranty/ESP coverage limits/policies/prior approvals are not altered by a TSB. Warranty/ESP coverage limits are determined by the identified causal part and verified using the OASIS part coverage tool.
Labor Times
| Description | Operation No. | Time |
| 2013-2016 Explorer/Police Interceptor Utility: Remove Both Front Door Trim Panels And Repair (Do Not Use With Any Other Labor Operations) | 172222A | 0.6 |
Repair/Claim Coding
| Causal Part: | 7823943 |
| Condition Code: | 33 |
Tool List
| 3/8″ | 7 mm Socket |
| 3/8″ | 10 mm Socket |
| 3/8″ | Ratchet |
| 3/8″ | 3 inch (76 mm) Extension |
| Pocket Flathead Screwdriver | |
| Plastic Trim Tool | |
| Needle Nose Pliers | |
| Straight Edge – Rotunda 164-R2760 or equivalent | |
| Pneumatic Staple Gun – Rotunda RTTP Kit SNSU502DT-PKG or equivalent | |
| 3/8″ Crown 3/16″ Leg Length Staples – Rotunda RTTP SNS87003 or equivalent |
Service Procedure
1. Remove both front door trim panels. Refer to Workshop Manual (WSM), Section 501-05.
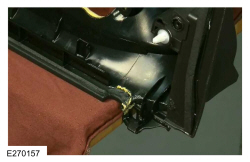
2. Place the door panel upside down on the edge of a clean workbench with the mirror sail raised portion of the door panel hanging off the edge of the workbench. (Figure 1)
Figure 1
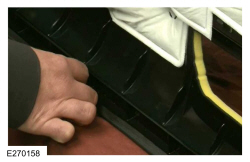
3. Roll the lip of the door panel fabric back over the edge of the door panel. (Figure 2)
Figure 2
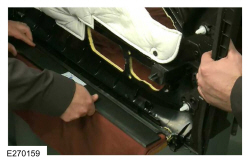
4. Place a 6 – 9.5 mm (0.25 – 0.375 inch) thick straight edge, similar to Rotunda straight edge 164-R2760, on the workbench between the edge of the door panel and the edge of the workbench. (Figure 3)
Figure 3
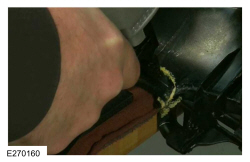
5. Connect pneumatic stapler, Rotunda RTTP SNSU502DT-PKG or equivalent, to a regulated air source set to approximately 414 kPa (60 PSI). Place a test staple at the end of the panel near the mirror sail and adjust the air pressure to the staple gun as necessary to insert the staples flush into the panel without going through the fabric. Use light to moderate downward pressure on the staple gun. Excessive downward pressure may cause the staple to pass through the door panel fabric. (Figure 4)
Figure 4
6. Starting with the straight edge in the center of the door panel, squeeze the straight edge up against the door panel and rotate the opposite end of the door panel towards the open end of the bench to help stretch the fabric in place.
7. Keep the straight edge squeezed against the door panel and start stapling from the center working out toward the end placing a staple approximately every 6 mm (0.25 inch). (Figure 5)
Figure 5
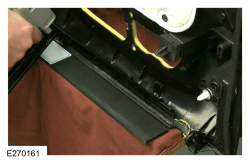
8. Return to the center and staple outward in the opposite direction keeping pressure on the straight edge against the panel. Rotate the panel against the straight edge to stretch the fabric into the proper place if necessary. (Figure 6)
Figure 6
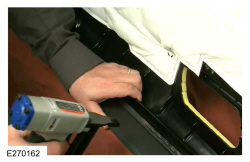
9. Inspect the placement of the staples and verify the fabric is stretched properly and is even and flat across the top of the panel. If necessary, a flat blade screwdriver and pliers can be used to remove the staples from the panel. (Figures 7-8)
Figure 7
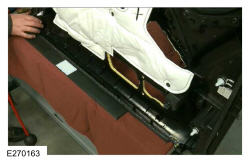
Figure 8
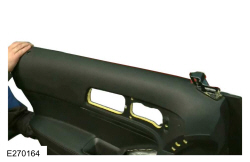
10. Repeat steps 2-9 on the other door panel.
11. To install, reverse the removal procedure.
Refer to the video procedure for further clarification of the Service Procedure.


