| “This site contains affiliate links for which OEMDTC may be compensated” |
NHTSA ID Number: 10225509
Manufacturer Communication Number: TSB 22-2403
Summary
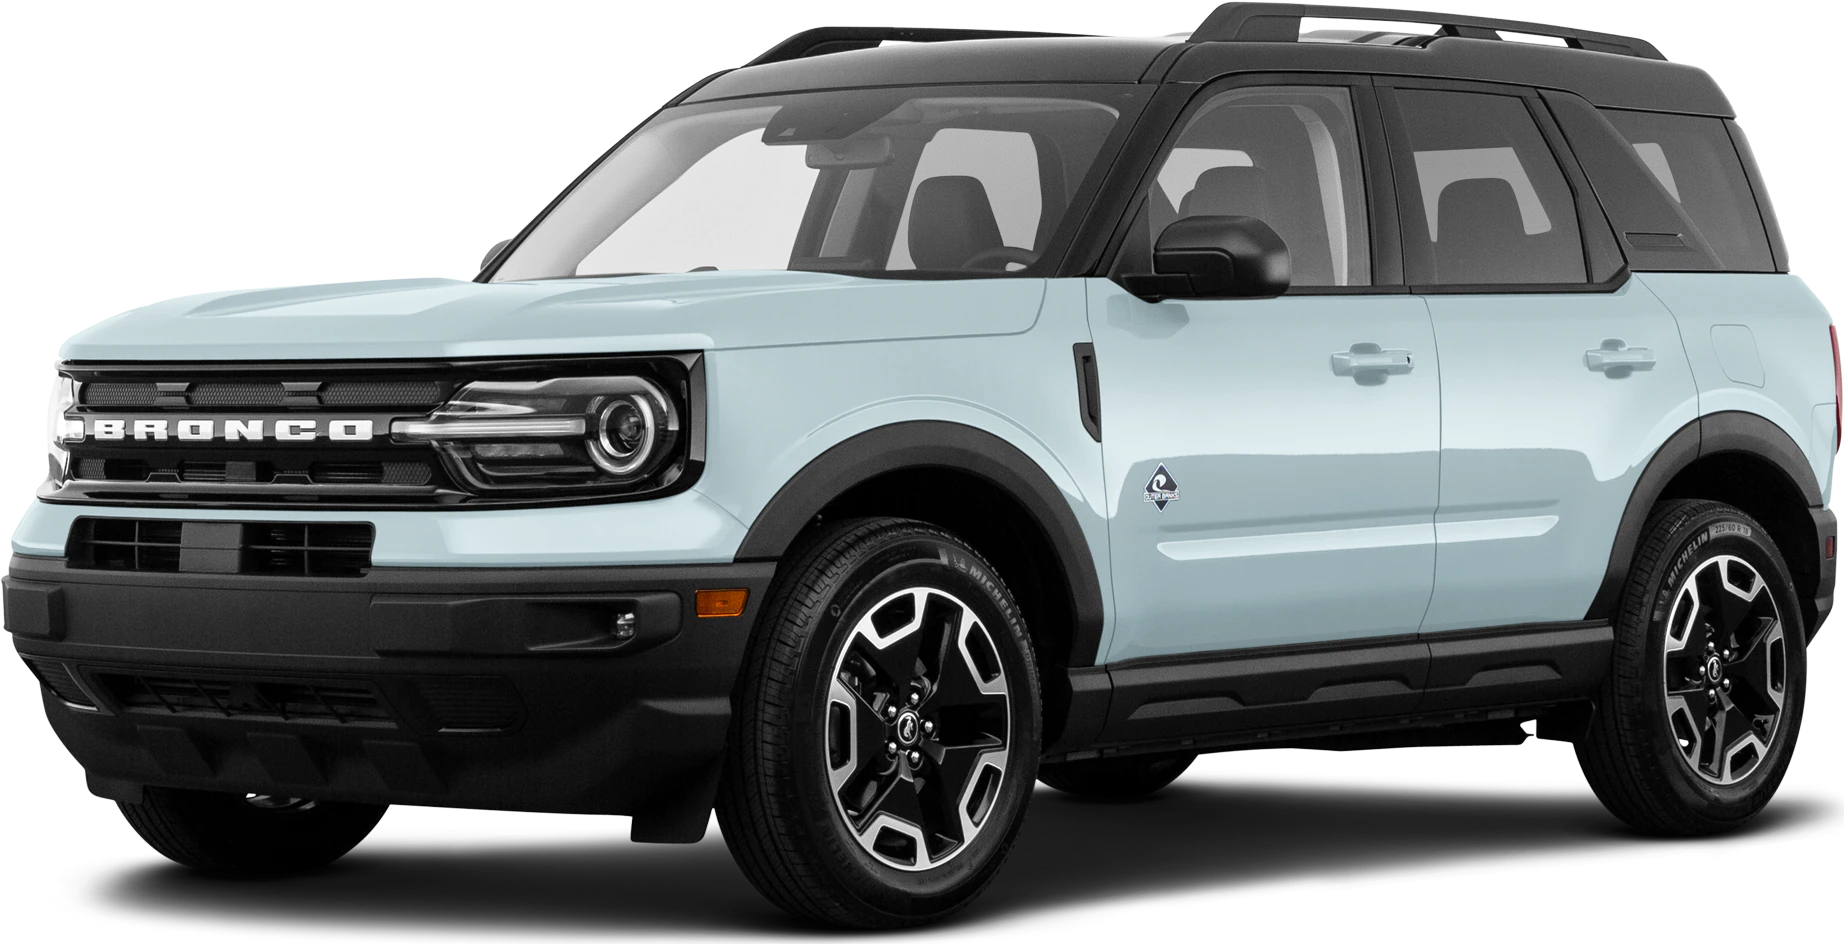
Some 2021-2022 Bronco vehicles may exhibit water leaks located at the A-pillars, overhead console/upfitter switches and/or sun visors. To correct the condition, follow the Service Procedure to diagnose and repair the water leak.
This bulletin supersedes 22-2074.
Model:
| Ford
2021-2022 Bronco |
Summary
This TSB supersedes TSB 22-2074 to update the Service Procedure.
Issue: Some 2021-2022 Bronco vehicles may exhibit water leaks located at the A-pillars, overhead console/upfitter switches and/or sun visors. To correct the condition, follow the Service Procedure to diagnose and repair the water leak.
Action: Follow the Service Procedure to correct the condition on vehicles that meet all of the following criteria:
- 2021-2022 Bronco
- Water leak coming from at least one of the following locations:
- A-pillars
- Sun visors
- Overhead console/upfitter switches
Parts
Parts To Replace Only If Necessary
| Service Part Number | Quantity | Description |
| M2DZ-7803110-C | 1 | Header Seal |
| Obtain Locally | As Needed | 3M™ Strip-Calk |
Service Procedure
NOTE: When submitting the warranty claim for this TSB, include the repair results such as the location of the water leak and/or the procedural Step that led to repairing the vehicle.
1. Does the vehicle exhibit a water leak from any of the locations shown in Figure 1 and Figure 2?
Figure 1 – Right side A-pillar shown, left side similar
Figure 2
(1). Yes – proceed to Step 2.
(2). No – this article does not apply. Refer to the Workshop Manual (WSM), Section 501-18.
2. Remove/retract the front roof sections.
(1). Vehicles equipped with a hard top roof, remove only the front 2 sections covering the driver and passenger seats. Refer to the Digital Owner’s Manual, Removable Vehicle Components > Removable Hard Top > Removing and Installing the Hard Top.
(2). Vehicles equipped with a soft top roof, place it in the partially open position. Refer to the Digital Owner’s Manual, Removable Vehicle Components > Removable Soft Top > Opening and Closing the Soft Top.
3. Is the vehicle equipped with a hard top roof?
(1). Yes – proceed to Step 4.
(2). No – proceed to Step 5.
4. Inspect the side roof channels shown in Figure 3. Are there any signs of water in this area leading back to the hard top center panel and hard top rear cap?
Figure 3 – Left side shown, right side similar
(1). Yes – inspect the hard top center panel seal (3-door vehicle) and/or hard top rear cap seal (5-door vehicles) for proper sealing. Repair as necessary. Repair is complete.
(2). No – proceed to Step 5.
5. Inspect the header seal locator pin which can be found to the left of the middle header seal bolt. Is the locator pin missing, broken and/or damaged? (Figure 4)
Figure 4
(1). Yes – proceed to Step 11
(2). No – proceed to Step 6.
6. Inspect the five fasteners that secure the header seal to the body. Make sure these are tightened to 9 Nm (80 lb-in). The nuts that receive these bolts are not welded to the body will free spin with the bolt if they are loose. If a bolt spins freely during this check, temporarily remove the windshield header trim panel to gain access. Refer to Workshop Manual (WSM), Section 501-05. (Figure 5)
Figure 5
7. Inspect the 2 small bolts on both corners of the header seal. Make sure these are tightened to 3 Nm (26 lb-in). (Figure 6)
Figure 6 – Left side shown, right side similar
8. By hand, firmly massage the header seal in the areas shown in Figure 7. The header seal has butyl located throughout this area. Firmly pressing down while massaging the header seal will make sure the butyl is properly adhered to the body creating a water-tight seal which is required to prevent leaks.
Figure 7 – Left side shown, right side similar
9. Reseal the header seal edge to the body. (Figure 8)
(1). Gain access to the front header seal edge by gently pulling back on the corner.
(2). Inspect for the presence of a clear plastic circular sticker attached to the body. The sticker may only be partially visible. If this sticker is present, use needle nose pliers to completely remove it.
(3). Insert a marble-sized ball of 3M™ Strip-Calk into the gap between the rubber header seal and the body. Return the header seal corner flap to its natural position then Firmly massage the seal in this area (pushing on the seal, onto the body) to be sure it is formed correctly, creating a water-tight seal. When complete, there should not be any visible strip-calk outside of the seal.
Figure 8 – Left side shown, right side similar
10. Has the water leak been repaired?
(1). Yes – reinstall the front roof panels, refer to Step 1. Repair is complete.
(2). No – proceed to Step 11.
11. Remove both windshield trim covers by pressing the button on the rear of the cover and rotating it forward. If a roof rack is installed on the vehicle, it needs to be removed using the assistance of a second person. Refer to the Digital Owner’s Manual for removal instructions. (Figure 9)
Figure 9
12. Remove the windshield header trim panel. Refer to Workshop Manual (WSM), Section 501-05, Interior Trim and Ornamentation > Removal and Installation > Windshield Header Trim Panel.
13. Remove the 5 center bolts and nuts securing the header seal to the body. (Figure 10)
Figure 10
14. Remove the 4 bolts (2 on each side) securing the header seal to the body. (Figure 11)
Figure 11 – Right side shown, left side similar
15. Remove the 2 pushpin fasteners (1 on each end). (Figure 12)
Figure 12
16. Remove the header seal from the vehicle.
17. Using a plastic scraper, remove all residual header seal foam that is still stuck to the vehicle. His foam will prevent proper sealing if left in place. The residual sticky adhesive can remain on the vehicle as it will assist with sealing.
18. Apply 3M™ Strip-Calk along the inside edges of the sheet metal drain openings. There are four drains, two on each A-pillar. These openings have multiple layers of sheet metal that must be completely sealed. (Figure 13)
Figure 13
19. Apply 3M™ Strip-Calk to the exposed body seams starting at the roof rack trim cover area and ending at the corner seal where the body seam ends. Do not leave a gap between the edge of the caulk and the corner seal. (Figures 14-17)
Figure 14 – Left side shown before application
Figure 15 – Left side shown, after application
Figure 16 – Right side shown, before application
Figure 17 – Right side shown, after application
20. Peel the plastic backings from the new header seal to expose the bottom sticky surface applied by the manufacturer.
21. Carefully install the header seal on the vehicle ensuring all attachment holes line up to the vehicle attachment points.
22. Install all header seal attachments.
(1). Tighten the 5 center bolts and nuts securing the header seal to the body to 9 Nm (80 lb-in). (Figure 10)
(2). Tighten the 4 bolts (2 on each side) securing the header seal to the body to 3 Nm (26 lb-in). (Figure 11)
(3). Install the 2 pushpin fasteners, 1 located at each end. (Figure 12)
23. Inspect the header seal to body surface by lightly pulling up on the edges of header seal. If any gaps are found in the sealing surface, fill the gaps using 3M™ Strip-Calk.
24. By hand, firmly massage the header seal in the areas shown in Figure 7 and any other areas where strip-calk was added. The header seal has adhesive located throughout these areas. Firmly pressing down while massaging the header seal will make sure the butyl is properly adhered to the body creating a water-tight seal.
25. Install the windshield header trim panel. Refer to WSM, Section 501-05, Interior Trim and Ornamentation > Removal and Installation > Windshield Header Trim Panel.
26. Pull/remove the cord that runs along the inside of the new header seal groove.
27. Install both windshield trim covers. If a roof rack was installed on the vehicle, it needs to be reinstalled with the assistance of a second person. Refer to the Digital Owner’s Manual for installation instructions. (Figure 9)
28. Return the roof to a fully closed position.
(1). Vehicles equipped with a hard top roof, remove only the front 2 sections covering the driver and passenger seats. Refer to the Digital Owner’s Manual, Removable Vehicle Components > Removable Hard Top > Removing and Installing the Hard Top.
(2). Vehicles equipped with a soft top roof, place it in the partially open position. Refer to the Digital Owner’s Manual, Removable Vehicle Components > Removable Soft Top > Opening and Closing the Soft Top.
29. If equipped, inspect the carpet for dampness and/or odor and service as necessary.
2 Affected Products
Vehicle
| MAKE | MODEL | YEAR |
| FORD | BRONCO | 2021-2022 |
1 Associated Document
Manufacturer Communications
22-2403
21 October 2022
https://www.nhtsa.gov/recalls?nhtsaId=10225509
MC-10225509-0001.pdf 659.227KB
 Loading...
NHTSA ID Number: 10208824
Manufacturer Communication Number: TSB 22-2074
Summary
Some 2021-2022 Bronco vehicles may experience a water leak that originates from the left and/or right A-pillars and/or the windshield header. This may be due to excessive gaps in the body seams from the factory. To correct the condition, follow the Service Procedure to reseal the affected body gaps and replace the front header seal.
1 Associated Document
Manufacturer Communications
22-2074
01 March 2022
https://www.nhtsa.gov/recalls?nhtsaId=10208824
MC-10208824-0001.pdf 376.097KB
Loading...
NHTSA ID Number: 10203652
Manufacturer Communication Number: TSB 21-2403
Summary
Some 2021 Bronco vehicles may experience a water leak that originates from the left and/or right A-pillars and/or the windshield header. This may be due to excessive gaps in the body seams from the factory. To correct the condition, follow the Service Procedure to reseal the affected body gaps and replace the front header seal.
1 Associated Document
Manufacturer Communications
21-2403
15 November 2021
https://www.nhtsa.gov/recalls?nhtsaId=10203652
MC-10203652-0001.pdf 1166.076KB
Loading...

- Plug Any Void –– Easily patch large cracks with confidence when using this thick auto seam sealer. This single-component panel bond compound provides superior adhesion on bare, primed, or painted metal surfaces on your vehicle or RV
- Complete Kit –– Comes with nitrile gloves and an application tip to make the process seamless This joint and seam filler set comes with everything you need and more. The sealant is compatible with any standard caulking gun
- Permanently Fill Gaps –– Don't settle for a body panel adhesive sealant that doesn't hold up. Trust in a non-shrinking, non-cracking and low odor formula that stays remarkably flexible over time. Prevent leaks and debris from infiltrating your vehicle, and promote corrosion resistance
- Primer and Paint Ready –– Get your project ready for the road in just 24 hours. Smooth out and let the quick-curing seam sealant settle in for 45 minutes. Then you're ready to prime and paint the automotive body filler for a flawless finish that blends right in
- All-Weather Performance –– High heat and humidity are no match for this car sealant. Enhanced moisture curing properties ensure a durable hold for interior or exterior use. Use a urethane sealer that is worlds ahead of any solvent-based solutions
![[2 Pack] Polyurethane Seam Sealer Automotive Compound Kit - Durable & Flexible Auto Body Filler - Seam & Joint Compound for Bare or Painted Surfaces - Automotive Seam Sealer White - RV Roof Sealant](https://m.media-amazon.com/images/I/413vOkWzIrL._SL160_.jpg)
- Plug Any Void –– Easily patch large cracks with confidence when using this thick auto seam sealer. This single-component panel bond compound provides superior adhesion on bare, primed, or painted metal surfaces on your vehicle or RV
- 2 Pack Value & Complete Kit - Comes with nitrile gloves and an application tip to make the process seamless This joint and seam filler set comes with everything you need and more. The sealant is compatible with any standard caulking gun
- Permanently Fill Gaps - Don't settle for a body panel adhesive sealant that doesn't hold up. Trust in a non-shrinking, non-cracking and low odor formula that stays remarkably flexible over time. Prevent leaks and debris from infiltrating your vehicle, and promote corrosion resistance
- Primer and Paint Ready - Get your project ready for the road in just 24 hours. Smooth out and let the quick-curing seam sealant settle in for 45 minutes. Then you're ready to prime and paint the automotive body filler for a flawless finish that blends right in
- All-Weather Performance - High heat and humidity are no match for this car sealant. Enhanced moisture curing properties ensure a durable hold for interior or exterior use. Use a urethane sealer that is worlds ahead of any solvent-based solutions
- EASY APPLICATIONS: Brushable and paintable consistency
- HIGH ADHESION: Works on both bare metal and painted surfaces
- FAST SKINNING: Starts in about 10 to 15 minutes
- STAYS IN PLACE: Less likely to drip, sag or run out of gaps being sealed
- NON-STAINING: For all-purpose autobody joint and seam sealing
- For professional use only – not for retail sale
- Fast curing and skins over quickly—can be painted 60 minutes after application
- Can be used for all sealing and adhesive applications with a standard caulking gun in both vertical and horizontal joints
- Flexible, non-staining, and non-sagging product that will not crack or shrink
- SINGLE COMPONENT FORMULA: Adheres well to bare metal, primed metal and painted surfaces
- MOISTURE CURING PROPERTY: Provides excellent performance in high heat and humidity environments
- NON-SHRINKING, NON-CRACKING: Remains flexible and offers superior results to solvent-based sealers
- QUICK PAINTABILITY: Allows painting after 30-45 minutes
- THICK CONSISTENCY: Fills large voids and can be smoothed to a featheredge or brushed

- Vehicle Body Repair: Automotive Seam Sealer for all-purpose auto body gap filling,joint and seam sealing.Protect your vehicle from rust and corrosion with these automotive seam sealers.Ideal for car ,truck, boat, RVs.
- High Adhesive & Durable - designed this urethane sealer for a range of materials, including bare metal or painted surfaces.
- Don't Shrink and Crack - low odor single component formula auto seam sealer provides flexible,non-staining, and non-sagging.
- Easy to Use - Fast cure time.You can paint over the undercoating . For best results, allow 24 hours and scuff before painting.
- Water and Corrosion Proof - Use interior or exterior to prevent weather from eroding your car.Service Temperature -40 to 170 °F (-40 to 77 °C).High heat performance.
- Seal seams and permanently repair holes in tents, tarps, awnings, rainflys and camping gear like Thermarest sleeping pads
- Treat up to up to 12’ of seams (1 oz) or repair torn outdoor fabrics with an adhesive that cures into a flexible rubber seal; also available in an 8 oz tube
- Waterproof gear with a sealant that flexes with fabric and bonds to nylon, polyester, canvas, leather and vinyl
- Apply it to repair or re-proof gear without worrying about the seal peeling or cracking; includes two applicator brushes
- Packaging may vary
- Seals Cracks, Crevices And Body Seams, Plus Waterproofs And Insulates
- Flexible - Will Not Shrink, Harden Or Crack
- Seals Cracks, Crevices And Body Seams
- For Firewalls, Floor Pans, Trunk Seams, Fender Extensions, Taillight Openings
- Paintable In 30 Minutes
- Seal up to 60 ft of seams on tents, tarps and awnings with this water-based seam sealant; cures in 2 hours at room temperature
- Use it on various outdoor fabrics including nylon, polyester, and canvas; previously known as Seam Sure
- Apply this long-lasting seal that is nearly invisible and flexes with fabric; available in 2 fl oz bottle
- Treat gear using the included applicator brush to make application quick and easy
- Packaging may vary
- Brushable Seam Sealer is fast drying and designed exclusively for automotive uses.
- This product remains flexible and will not crack, harden, sink or sag.
- Brushable Seam Sealer is easily applied with a brush and holds a perfect brush mark to match that O.E.M. seam.
- It provides excellent adhesion, seals cracks, crevices, body seams and is ideal for use on all lap and flange seams and joints.
- Brushable Seam Sealer is paintable in 30 to 60 minutes and comes in a light gray color.
Last update on 2024-06-10 / Affiliate links / Images from Amazon Product Advertising API
This product presentation was made with AAWP plugin.
SEOCONTENT-START
TECHNICAL SERVICE BULLETIN Water Leak From The A-Pillars, O erhead Console/Upfitter Switches And/Or Sun Visors 22-2403 21 October 2022 This bulletin supersedes 22-2074. Model: Ford 2021-2022 Bronco Summary This TSB supersedes TSB 22-2074 to update the Service Procedure. Issue: Some 2021-2022 Bronco vehicles may exhibit water leaks located at the A-pillars, overhead console/upfitter switches and/or sun visors. To correct the condition, follow the Service Procedure to diagnose and repair the water leak. Action: Follow the Service Procedure to correct the condition on vehicles that meet all of the following criteria: • 2021-2022 Bronco • Water leak coming from at least one of the following locations: – A-pillars – Sun visors – Overhead console/upfitter switches Parts Parts To Replace Only If Necessary Service Part Number Quantity Description M2DZ-7803110-C 1 Header Seal Obtain Locally As Needed 3M™ Strip-Calk Warranty Status: Eligible under provisions of New Vehicle Limited Warranty (NVLW)/Service Part Warranty (SPW)/Special Service Part (SSP)/Extended Service Plan (ESP) coverage. Limits/policies/prior approvals are not altered by a TSB. NVLW/SPW/SSP/ESP coverage limits are determined by the identified causal part and verified using the OASIS part coverage tool. Labor Times Description 2021-2022 Bronco: Diagnose And Repair The Water Leak Following The Service Procedure (Do Not Use With Any Other Labor Operations) Operation No. MT222403 Time Actual Time Repair/Claim Coding Causal Part: 7803110 Condition Code: 68 Service Procedure NOTE: When submitting the warranty claim for this TSB, include the repair results such as the location of the water leak and/or the procedural Step that led to repairing the vehicle. 1. Does the vehicle exhibit a water leak from any of the locations shown in Figure 1 and Figure 2? Figure 1 – Right side A-pillar shown, left side similar Figure 2 (1). Yes – proceed to Step 2. (2). No – this article does not apply. Refer to the Workshop Manual (WSM), Section 501-18. 2. Remove/retract the front roof sections. (1). Vehicles equipped with a hard top roof, remove only the front 2 sections covering the driver and passenger seats. Refer to the Digital Owner’s Manual, Removable Vehicle Components > Removable Hard Top > Removing and Installing the Hard Top. (2). Vehicles equipped with a soft top roof, place it in the partially open position. Refer to the Digital Owner’s Manual, Removable Vehicle Components > Removable Soft Top > Opening and Closing the Soft Top. 3. Is the vehicle equipped with a hard top roof? (1). Yes – proceed to Step 4. (2). No – proceed to Step 5. 4. Inspect the side roof channels shown in Figure 3. Are there any signs of water in this area leading back to the hard top center panel and hard top rear cap? Figure 3 – Left side shown, right side similar (1). Yes – inspect the hard top center panel seal (3-door vehicle) and/or hard top rear cap seal (5-door vehicles) for proper sealing. Repair as necessary. Repair is complete. (2). No – proceed to Step 5. 5. Inspect the header seal locator pin which can be found to the left of the middle header seal bolt. Is the locator pin missing, broken and/or damaged? (Figure 4) Figure 4 (1). Yes – proceed to Step 11 (2). No – proceed to Step 6. 6. Inspect the five fasteners that secure the header seal to the body. Make sure these are tightened to 9 Nm (80 lb- in). The nuts that receive these bolts are not welded to the body will free spin with the bolt if they are loose. If a bolt spins freely during this check, temporarily remove the windshield header trim panel to gain access. Refer to Workshop Manual (WSM), Section 501-05. (Figure 5) Figure 5 7. Inspect the 2 small bolts on both corners of the header seal. Make sure these are tightened to 3 Nm (26 lb-in). (Figure 6) Figure 6 – Left side shown, right side similar 8. By hand, firmly massage the header seal in the areas shown in Figure 7. The header seal has butyl located throughout this area. Firmly pressing down while massaging the header seal will make sure the butyl is properly adhered to the body creating a water-tight seal which is required to prevent leaks. Figure 7 – Left side shown, right side similar 9. Reseal the header seal edge to the body. (Figure 8) (1). Gain access to the front header seal edge by gently pulling back on the corner. (2). Inspect for the presence of a clear plastic circular sticker attached to the body. The sticker may only be partially visible. If this sticker is present, use needle nose pliers to completely remove it. (3). Insert a marble-sized ball of 3M™ Strip-Calk into the gap between the rubber header seal and the body. Return the header seal corner flap to its natural position then Firmly massage the seal in this area (pushing on the seal, onto the body) to be sure it is formed correctly, creating a water-tight seal. When complete, there should not be any visible strip-calk outside of the seal. Figure 8 – Left side shown, right side similar 10. Has the water leak been repaired? (1). Yes – reinstall the front roof panels, refer to Step 1. Repair is complete. (2). No – proceed to Step 11. 11. Remove both windshield trim covers by pressing the button on the rear of the cover and rotating it forward. If a roof rack is installed on the vehicle, it needs to be removed using the assistance of a second person. Refer to the Digital Owner’s Manual for removal instructions. (Figure 9) Figure 9 12. Remove the windshield header trim panel. Refer to Workshop Manual (WSM), Section 501-05, Interior Trim and Ornamentation > Removal and Installation > Windshield Header Trim Panel. 13. Remove the 5 center bolts and nuts securing the header seal to the body. (Figure 10) Figure 10 14. Remove the 4 bolts (2 on each side) securing the header seal to the body. (Figure 11) Figure 11 – Right side shown, left side similar 15. Remove the 2 pushpin fasteners (1 on each end). (Figure 12) Figure 12 16. Remove the header seal from the vehicle. 17. Using a plastic scraper, remove all residual header seal foam that is still stuck to the vehicle. His foam will prevent proper sealing if left in place. The residual sticky adhesive can remain on the vehicle as it will assist with sealing. 18. Apply 3M™ Strip-Calk along the inside edges of the sheet metal drain openings. There are four drains, two on each A-pillar. These openings have multiple layers of sheet metal that must be completely sealed. (Figure 13) Figure 13 19. Apply 3M™ Strip-Calk to the exposed body seams starting at the roof rack trim cover area and ending at the corner seal where the body seam ends. Do not leave a gap between the edge of the caulk and the corner seal. (Figures 14-17) Figure 14 – Left side shown before application Figure 15 – Left side shown, after application Figure 16 – Right side shown, before application Figure 17 – Right side shown, after application 20. Peel the plastic backings from the new header seal to expose the bottom sticky surface applied by the manufacturer. 21. Carefully install the header seal on the vehicle ensuring all attachment holes line up to the vehicle attachment points. 22. Install all header seal attachments. (1). Tighten the 5 center bolts and nuts securing the header seal to the body to 9 Nm (80 lb-in). (Figure 10) (2). Tighten the 4 bolts (2 on each side) securing the header seal to the body to 3 Nm (26 lb-in). (Figure 11) (3). Install the 2 pushpin fasteners, 1 located at each end. (Figure 12) 23. Inspect the header seal to body surface by lightly pulling up on the edges of header seal. If any gaps are found in the sealing surface, fill the gaps using 3M™ Strip-Calk. 24. By hand, firmly massage the header seal in the areas shown in Figure 7 and any other areas where strip-calk was added. The header seal has adhesive located throughout these areas. Firmly pressing down while massaging the header seal will make sure the butyl is properly adhered to the body creating a water-tight seal. 25. Install the windshield header trim panel. Refer to WSM, Section 501-05, Interior Trim and Ornamentation > Removal and Installation > Windshield Header Trim Panel. 26. Pull/remove the cord that runs along the inside of the new header seal groove. 27. Install both windshield trim covers. If a roof rack was installed on the vehicle, it needs to be reinstalled with the assistance of a second person. Refer to the Digital Owner’s Manual for installation instructions. (Figure 9) 28. Return the roof to a fully closed position. (1). Vehicles equipped with a hard top roof, remove only the front 2 sections covering the driver and passenger seats. Refer to the Digital Owner’s Manual, Removable Vehicle Components > Removable Hard Top > Removing and Installing the Hard Top. (2). Vehicles equipped with a soft top roof, place it in the partially open position. Refer to the Digital Owner’s Manual, Removable Vehicle Components > Removable Soft Top > Opening and Closing the Soft Top. 29. If equipped, inspect the carpet for dampness and/or odor and service as necessary. © 2022 Ford Motor Company All rights reserved. NOTE: The information in Technical Service Bulletins is intended for use by trained, professional technicians with the knowledge, tools, and equipment to do the job properly and safely. It informs these technicians of conditions that may occur on some vehicles, or provides information that could assist in proper vehicle service. The procedures should not be performed by “do-it-yourselfers”. Do not assume that a condition described affects your car or truck. Contact a Ford or Lincoln dealership to determine whether the Bulletin applies to your vehicle. Warranty Policy and Extended Service Plan documentation determine Warranty and/or Extended Service Plan coverage unless stated otherwise in the TSB article. The information in this Technical Service Bulletin (TSB) was current at the time of printing. Ford Motor Company reserves the right de this information with updates. The most recent information is available through Ford Motor Company’s on-line technical resources.
**************************************************************************************************************
SEOCONTENT-END