| “This site contains affiliate links for which OEMDTC may be compensated” |
| EXHAUST – SULFUR ODOR AFTER HARD ACCELERATION |
FORD : : | 2009-2014 Flex |
2009-2014 Flex vehicles may exhibit an exhaust odor in the vehicle with the auxiliary climate control system on.
This may be more pronounced after hard acceleration or driving in hilly conditions.
Customers may indicate the odor smells like sulfur.
SERVICE PROCEDURE
- Remove the rear bumper cover.
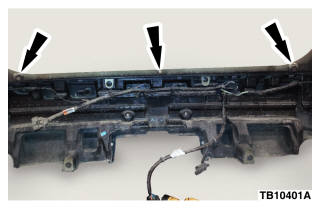
- Inspect the attachment points on the bumper cover. Does foam surround the attachment points? (Figure 1)
- Yes – proceed to Step 3.
- No – install foam around the missing attachment point locations. Proceed to Step 3.
Figure 1
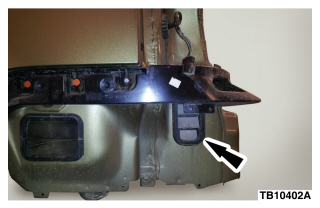
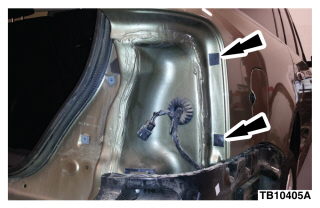
- Replace the left side upper / rear air extractor. (Figure 2)
Figure 2
- Is the vehicle a 2012 – 2014 Flex?
- Yes – proceed to Step 5.
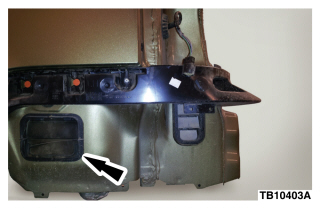
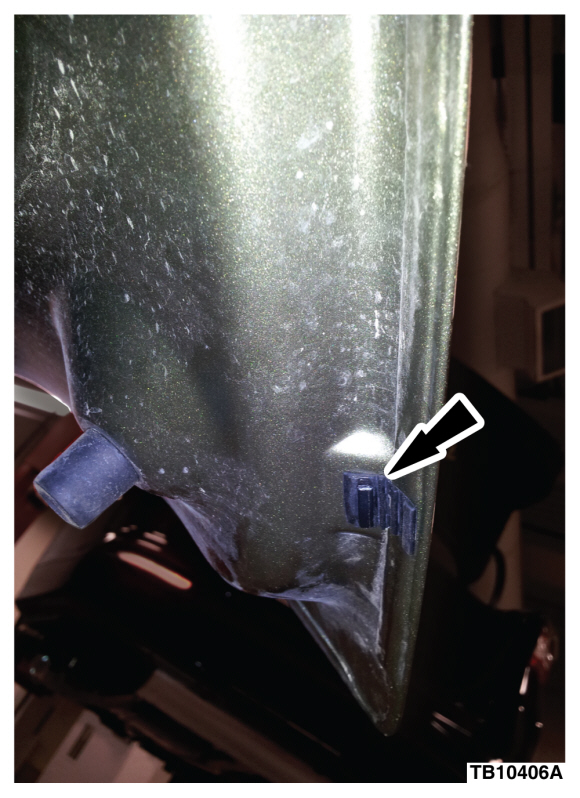
- No – replace both lower / forward air extractors. Proceed to Step 5. (Figure 3)
Figure 3
- Remove the liftgate release switch moulding.
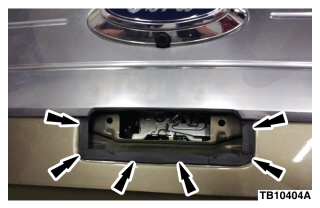
- Install foam from the Rotunda Squeak and Rattle Repair Kit (164-R4901) around the liftgate release switch moulding opening on the liftgate. (Figure 4)
Figure 4
- Install the liftgate release switch moulding.
- Install foam from the Rotunda Squeak and Rattle Repair Kit (164-R4901) around the four (4) tail lamp assembly attachment holes. Cut pieces large enough to fully cover the attachment point. (Figure 5)
Figure 5
- Open the liftgate and install a new drain valve in each of the three (3) drain holes. (Figure 6)
Figure 6
- Raise the vehicle on hoist.
- Lower and support the rear section of the exhaust system.
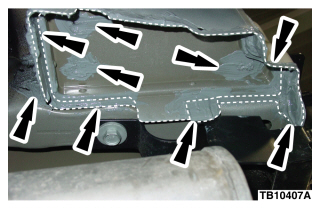
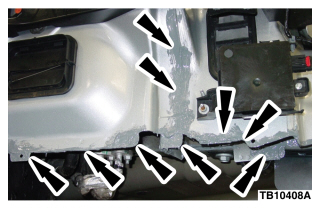
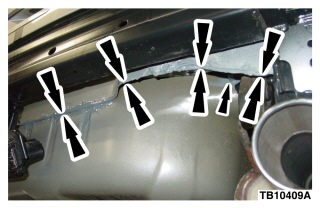
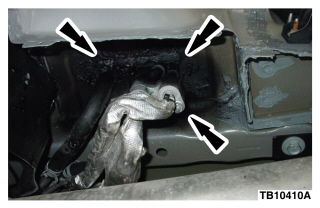
- Clean the areas on the underside of the vehicle where seam sealer will be applied. (Figures 7-9)
Figure 7
Figure 8
Figure 9
- Cover the exhaust system and auxiliary climate control drain.
- Apply a generous amount of Motorcraft Seam Sealer to the rear horizontal sheet metal lap joints on the left and right sides of the vehicle, and the rear sheet metal overlap flange across the rear of the vehicle. (Figures 7-9)
- Spray a generous amount of 3M Rubberized Undercoating around auxiliary the air conditioning lines and seam sealer areas. (Figure 10)
Figure 10
- Install the rear exhaust system.
- Install the rear bumper cover.
| Obtain Parts Locally | |
|---|---|
| Part Number | Part Name |
| 08883 | 3M Rubberized Undercoating |
| 164-R4901 | Foam – Rotunda Squeak And Rattle Repair Kit |
| AL2Z-61280B62-A | Grille – Air Inlet (Forward/Lower) (2 Req) |
| DA8Z-78280B62-A | Grille – Air Inlet (Rear/Upper) |
| 4M8Z-54280B62-A | Valve Assembly Auto Drain (3 Req) |
| TA-2 | Motorcraft Seam Sealer |
Price Disclaimer
