
NHTSA ID Number: 10216461
Manufacturer Communication Number: TSB 22-2290
Summary
2020-2021 Police Interceptor Utility vehicles equipped with a 3.3L Duratec, 3.3L Duratec Hybrid, or 3.0L EcoBoost engine have a module programming update that allows the operator to command a virus reducing heating procedure that, when combined with Centers for Disease Control and Prevention (CDC) guidelines, helps reduce virus counts inside the interior of Police Interceptor Utility vehicles. Follow the Service Procedure to perform the virus reducing heating procedure.
This bulletin supersedes 21-2359.
Model:
Ford
2020-2021 Explorer
Engine: 3.0L EcoBoost
Engine: 3.3L Duratec
Engine: 3.3L Duratec Hybrid
Summary
This article supersedes TSB 21-2359 to update the Service Procedure.
Issue: 2020-2021 Police Interceptor Utility vehicles equipped with a 3.3L Duratec, 3.3L Duratec Hybrid, or 3.0L EcoBoost engine have a module programming update that allows the operator to command a virus reducing heating procedure that, when combined with Centers for Disease Control and Prevention (CDC) guidelines, helps reduce virus counts inside the interior of Police Interceptor Utility vehicles. Follow the Service Procedure to perform the virus reducing heating procedure.
NOTE: This is not a diagnostic routine and should not be used in any way to repair a vehicle. This procedure cannot be submitted on a warranty claim. This procedure is only intended for the first and second row seating areas. Ambient temperatures will affect this procedure. When performing this procedure, ambient temperatures should be above approximately 10°C (50°F). Weather conditions such as wind and rain may also affect the amount of time needed to perform the procedure.
Action: Follow the Service Procedure on vehicles that meet all of the following criteria:
- 2020-2021 Police Interceptor Utility vehicles
- One of the following engine configurations:
- 0L EcoBoost
- 3L Duratec
- 3L Duratec Hybrid
Service Procedure
- Using the latest software level of the Ford
 Diagnosis and Repair System (FDRS), reprogram the powertrain control module (PCM), hybrid powertrain control module [if HEV] (HPCM/SOBDMC), body control module (BCM), the gateway module (GWM) and the heating, ventilation and air conditioning (HVAC) module.
 - Once the reprogramming is complete, reconfigure the HVAC module using the HVAC Configuration Application in the FDRS.
- Once the reconfiguration is complete, the vehicle operator has the ability to command heating of the vehicle interior without further use of a diagnostic scan tool.
- It is suggested to label the vehicle as having the update performed. Use the Ford Authorized Modification Label, to record the vehicle’s information.
Virus Reducing Heating Procedure
WARNING: Ford Motor Company is not responsible for any failure in following these instructions which may result in serious personal injury or damage to a vehicle. Performing this procedure will increase the interior temperature of the vehicle. Before performing this procedure, remove all occupants from the vehicle along with any equipment that should not be exposed to excessive heat. These may include, but are not limited to: personal items, cell phones, laptops, battery operated equipment, weapons, ammunition, oxygen tanks, backpacks, gas detectors, liquids, medical equipment, personal protective equipment and/or potentially flammable material. Make sure to exercise caution when entering the vehicle after this procedure has been performed. Interior surfaces will be hot. Exhaust gases will be generated during this procedure. Failure to perform this procedure in a well ventilated area could result in elevated concentrations of exhaust gases in and around the vehicle.
CAUTION: Performing the interior cabin heating procedure has the possibility of inadvertently illuminating the tire pressure monitoring system (TPMS) and/or rear backup sensor warning indicator on the instrument panel cluster (IPC). Make sure to verify tire pressures are correct before starting this procedure. If a TPMS warning indicator remains illuminated after the interior cabin heating procedure has completed, and tire pressures are not low, drive the vehicle at speeds over 32 km/h (20 mph) for approximately 5 minutes to reset the TPMS.
NOTE: This procedure is intended to be run on vehicles that follow all manufacturer suggested maintenance and with all fluid levels being set to manufacturer suggested levels.
NOTE: Vehicle must have at least a 1/4 tank of fuel to perform the procedure.
NOTE: If the Ford installed secure idle vehicle option is to be used in conjunction with this interior cabin heating procedure, make sure to press the secure idle button before entering this procedure.
- Place the vehicle in park (P) in a well-ventilated area or in a garage with vehicle exhaust extraction equipment attached and properly functioning.
- Is the engine at or near normal operating temperature (for 3.0L EcoBoost and 3.3L Duratec), or Ready to Drive (for 3.3L Duratec Hybrid)?
(1). Yes – proceed to Step 3.
(2). No – bring the engine up to normal operating temperature or Ready to Drive.
NOTE: Do not open the hood, liftgate, doors, or windows while the procedure is in operation as it may extend or abort the procedure.
- To maximize heat transfer to the second row seating area, open any sliding partitions and remove any first-to-second row barriers that can be easily detached or removed.
- Make sure that all footwells and HVAC ducts are open and clear from any obstruction. This includes removing or relocating any loose items located under the front seats.
- Make sure all instrument panel register vents are pointing directly towards the rear of the vehicle.
NOTE: NOTE: To assist with this procedure, it is recommended that a partition, potentially made of foam board insulation, wood, cardboard, or equivalent be created and installed between the second row seating area and the cargo area. (Figure 1)
Figure 1
- Start the vehicle.
- Using the cruise control setting buttons located on the steering wheel, press the buttons in the following sequence: Set+, Set-, Set+, Set-, On/Off, Cancel, On/Off, Cancel.
WARNING: If the operator commanded interior cabin heating needs to be canceled for any reason, press the brake pedal using the operator’s foot.
NOTE: Perform this sequence in rapid succession to initiate the procedure.
NOTE: Do not touch any other vehicle inputs after entering the cruise control button sequence. Pressing any other buttons or driver inputs could cause this procedure to abort.
NOTE: The vehicle operator may notice the speedometer moving along with the cruise control icon being illuminated.
- Exit the vehicle.
WARNING: Failure to exit the vehicle after initiating the procedure will result in exposure to dangerously high temperatures and could result in exposure to elevated concentrations of exhaust gases.
NOTE: This procedure may last up to 2 hours. This largely depends on exterior and interior ambient temperature, initial engine temperature, and vehicle configurations such as partitions between the rows and rear climate.
- The vehicle exterior lighting flashes in various patterns that indicate the different states of the procedure.
(1). When the procedure is running, the hazards flash once indicating the procedure is in process.
(2). When the procedure has ended, the reverse lights flash indicating the procedure has stopped.
(3). A double hazard flash means the procedure successfully completed.
(4). A triple hazard flash means the procedure aborted.
WARNING: Make sure to exercise caution when entering the vehicle after this procedure has been performed. Interior surfaces will be hot.
- After the procedure has completed, open the doors and windows to allow for a minimum of 5 minutes cooling time before entering the vehicle.
- Turn the climate control system on and set it to A/C to assist with further cooldown.
- After the vehicle has cooled, remove any temporary partitions installed for this procedure. Return any items removed from the vehicle.
2 Affected Products
Vehicle
| MAKE | MODEL | YEAR |
| FORD | EXPLORER INTERCEPT HYBRID | 2020-2021 |
1 Associated Document
Manufacturer Communications
22-2290
20 July 2022
MC-10216461-0001.pdf 130.847KB
Reprogramming
Service Information & Reprogramming
Module Reprogramming
| Diagnostic Software | Interface Device | Complete Vehicle Diagnostics | Module Programming | ||
| 1996-2017 Model Year |
2018-Present Model Year |
1996-2017 Model Year |
2018-Present Model Year |
||
| IDS/FDRS | VCM, VCM II, VCMM |
X | X | X | X |
| FJDS/FDRS | Compatible J2534 Devices (Including VCM II and VCMM) |
X | X | X | |
Detailed system requirements, installation, and support information for each product is located under the diagnostics tool support tab for each product.
Integrated Diagnostic Software (IDS) / Ford Diagnosis & Repair System (FDRS)
For use with VCM I, VCM II, VMM and VCMM hardware devices only. The complete factory Ford Motor Company vehicle diagnostic tool that provides complete dealership level vehicle diagnostic coverage for all 1996 to present Ford, Lincoln and Mercury vehicles. The IDS software includes time based access to the IDS software, software updates and calibration files.
Ford J2534 Diagnostic Software (FJDS) / Ford Diagnosis & Repair System (FDRS)
For use with compatible J2534 hardware devices. FJDS software provides Ford Module Programming functionality that covers 1996 to present Ford, Lincoln and Mercury module reprogramming functions, plus complete dealership level vehicle diagnostic software for all 2018 to present Ford and Lincoln vehicles. The FJDS software license includes time based access to the FJDS software, software updates and calibration files.
Latest Calibration Information
Module Build Data (As-Built)
Use VIN to obtain As-Built data

- J2534 Pass-Thru Programmer: TOPDON RLink J2534 is an advanced diagnostic and reprogramming tool that support all J2534 protocols, as well as D-PDU, CAN-FD and DoIP, ensuring compatibility with a wide range of modern vehicles. It offers extensive versatility with support for over 18 major automotive brands, including Chrysler, Ford, GM, Nissan, Toyota, Honda, Subaru, Land Rover/Jaguar, Volvo, Wuling, Volkswagen/Audi, Mercedes-Benz, and BMW. NOTE: Not compatible with Ford IDS diagnostic software
- All-in-One OEM Diagnostics: This J2534 ECU programming tool elevates your automotive repair capabilities to new heights by delivering complete OEM diagnosis. Boasting comprehensive full-system diagnostics, intuitive repair guides, advanced ECU programming and coding, common reset services, a vast library of repair information and more, this all-in-one solution empowers technicians to effortlessly tackle complex vehicle issues with ease. *Not compatible with 24V vehicles
- Proven Performance You Can Trust: Backed by over 10000 real vehicle tests and benefit from a wealth of practical experience, this OEM reprogramming tool guarantees stable and exceptional performance. Supported by TOPDON's dedicated technical experts with in-depth knowledge of both auto repair and J2534 Pass-Thru programming, the RLink J2534 provides prompt and professional assistance, ensuring a smooth setup and reliable compatibility
- Integrated Excellence, Always Up-to-Date: Featuring the exclusive RLink Platform to provide a streamlined experience with one-click driver installation and management, ensuring flawless integration with your OE software, maintaining the original performance quality. The built-in operation guide makes mastering OE software quick and easy, so you can get started right away. Plus, with lifetime free updates, your diagnostics will stay current with the latest drivers and innovations
- Efficiency Meets Versatility: Engineered to support three CAN channels simultaneously - CAN FD and CAN-CC included, giving you the edge in fast troubleshooting. To perfectly synchronized with the OE software, please diagnose with active subscriptions and make sure your computer system is running a compatible 64-bit Windows version (7, 8, 10 or later) to fully leverage the power of RLink J2534. *We don't provide extra OE software

- Advanced VCI Box, Industry-leading J2534 Pass-Thru Technology: This J2534 Pass-Thru Programmer is designed espically for technicians, independent shop owners, and DIY enthusiasts, enables fast, reliable computer-based programming. It supports all J2534 protocols—including the latest DoIP and CAN FD—ensuring full compatibility with both legacy and next-generation vehicles.
- High-Speed OEM-Level Diagnostics & Programming: Unlock true OEM functionality with comprehensive system diagnostics, guided troubleshooting, coding, adaptations, resets, and programming—all designed to slash repair time. This all-in-one tool eliminates the need for multiple OEM devices, boosting efficiency and cutting costs. Equipped with High-Speed USB, it delivers 10x more data per second than competing solutions
- Coverage for 17 Car Brands & Ultra Reliability: Works seamlessly for Chrysler, for Ford(Forscan), for GM, for Nissan, for Toyota, for Honda, for Subaru(SSM4), for Land Rover/Jaguar, for Volvo, for Wuling, for Volkswagen, for Mercedes-Benz, and for BMW. Backed by over 10000 real vehicle tests and benefit from a wealth of practical experience, this OEM reprogramming tool guarantees stable and exceptional performance
- User-Friendly RLink Platform & Expert Support: TOPDON’s proprietary driver management platform offers a clean interface and lifetime free updates. Access a rich library of real-world case studies to stay ahead of the curve. Backed by a support team with 10+ years of J2534 and automotive repair experience, we provide one-on-one assistance to resolve any technical issue.
- 6.6 ft USB-C Cable & Portable Storage Case: The RLink J2534 diagnostic tool features a 6.6ft USB 2.0 Cable and a 1.2 ft OBDII Extension Cable, allows to connection your computer easily outside the vehicle. The included handled carry case offers easy portability, storage, and hanging options—keeping your gear clean and ready to go, anywhere.
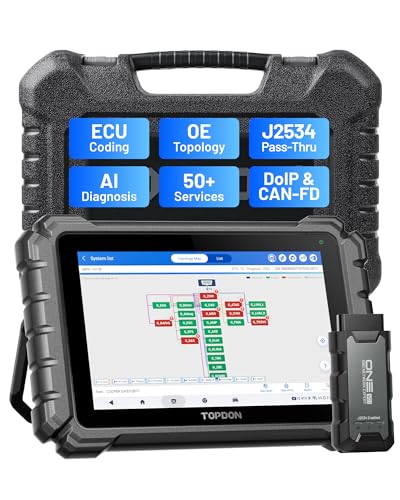
- Dual WiFi & 10.1" Touchscreen: Provides a stable, high-speed wireless link 3x faster than bluetooth, and a responsive, professional interface. Topdon ONE obd2 scanner diagnostic tool ensures smooth, non-lagging diagnostic scan, boosting mechanic efficiency
- J2534 Pass-Thru Support: The included ONE VCI supports the J2534 standard, allowing it to function as a pass-thru device when paired with OEM diagnostic software.Through TOPDON’s RLink platform, technicians can perform dealer-level coding, expanding in-house capabilities without investing in multiple factory automotive scan tools
- OE Topology Mapping: Visualize the vehicle’s ECU network exactly as it’s built.Zoom, pan, and highlight specific modules to pinpoint component issues with precision.Topology mapping displays real-time communication between modules
- 50+ Service Functions: Covers high-demand services like ADAS calibration, DPF regen, TPMS reset, ABS bleed, and throttle adaptation.Expands your service menu, allows you to charge premium rates, and turns away zero jobs due to lack of tooling. Vehicle-specific functionality may vary
- Advaned ECU Coding: 10 of the most serviced brands in North America, including full ECU coding and flash hidden support for BMW, VW, Au-di, Benz, Porsche, Toyota, Ni ssan and more. Enables module replacement, feature customization, and personal settings with automatic backup or restore.Lets your shop safely offer high-margin customization services, attracting more customers and boosting profit

- [J2534 Pass-Thru Programmer] - TOPDON RLink J2534 is engineered for professional technicians, delivering OEM diagnostic and reprogramming capabilities. It supports all J2534 protocols, CAN-FD, DoIP, D-PDU. Compatible with 17 vehicle brands—such as Chrysler, Ford, GM, KIA, Hyundai, Nissan, Toyota, Honda, Subaru, Mitsubishi, MAZDA, Land Rover/Jaguar, Volvo, Volkswagen/Audi, Mercedes-Benz, and BMW. RLink J2534 can help reduce the cost of purchasing equipment from different brands.
- [All-in-One OEM Reprogramming and Diagnostics] - When seamlessly integrated with OEM diagnostic software, this dongle enables you to perform a wide range of functions, including ECU programming and coding, DTC reading and clearing, active tests, component matching, adaptations, rewriting, guided troubleshooting, and more. This all-in-one tool eliminates the need for multiple OEM devices, significantly boosting work efficiency.
- [Tested, Trusted, and Proven for Accuracy] - TOPDON RLink J2534 is renowned for its reliability, having successfully completed over 10,000 real-vehicle tests. The wealth of data and hands-on experience behind it ensures consistent performance and accurate results. You can trust this tool to deliver optimal performance.
- [One-Click Installation, Continuous Updates] - The exclusive TOPDON RLink platform streamlines installation with a one-click driver setup, allowing you to quickly access OEM software for diagnostic and reprogramming tasks. With lifetime free updates, your RLink J2534 stays current without any additional cost, ensuring reliable performance for the long term. *We don't provide extra OE software.
- [Works with Windows Compatibility and OEM Software Subscription] - The RLink J2534 supports three CAN channels - including CAN FD and CAN-CC, providing advantages in the process of rapid troubleshooting. Compatible with Windows 7, 8 and 10 (64-bit) and higher versions of the system. For full functionality, an active OEM software subscription is required for each supported vehicle brand. Please note that the dongle does not include OEM software, which must be purchased separately to access brand-specific diagnostic and reprogramming features.
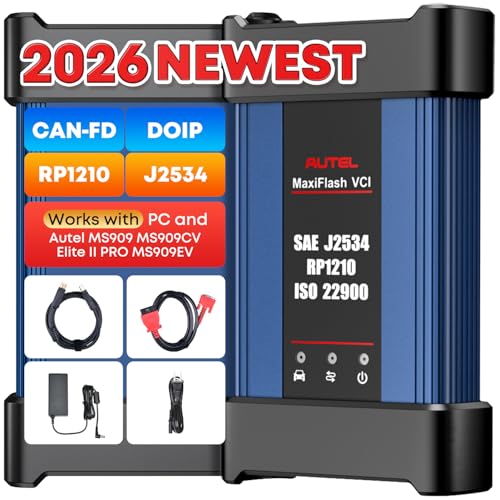
- 💯【Conta.ct us for Support Directly】For any issues experienced after purchase, please reach out to: 📞autelsupply@ outlook. com🛣️. Our team will provide perfect solution for you. For tech support or [explore additional accessory], please cont.act our team: 📞autelsupply@ outlook. com🛣️.
- 🌎【Autel J2534 Pass-Thru Progra.mmer】As an OEM Pass-Thru Progra.mmer Vehicle interface for multiple makes, Autel MaxiFlash J2534 support all J2534 protocols, D-PDU, CAN-FD and DoIP protocols. 2026 newer Autel MaxiFlash J2534 VCI can works with P-C and download OEM vehicle software, seamlessly conduct OE-level diagnostic-progra.mming-c0ding. Also, Work with Elite II Pro/ Ultra Lite/ MS909/ MS909CV/ MS909EV to directly pro.gram on Merce.des-Be.nz & BM.W. Autel J2534 Progr.ammer is a multi-functional device and supports 10+ major brands, including for Hond.a, G.M, LandRo.ver, BM.W, Chrysl.er, For.d, Hyun.dai, Ki.a, Merc.edes B.enz, Toyot.a, Volksw.agen etc.
- 🌎【Enhanced Protocol: J2534/D-PDU/RP1210/CAN FD/DoIP】Autel MaxiFlash JVCI is a blueto.oth communicate device, it supports latest CAN FD DoIP CAN protocols, compliant with automotive D-PDU/ J2534/ RP1210 standards. It can perform standard PassThru J2534 functions: compatible with Toyota Techstream, Volvo VIDA, Honda HDS, Jaguar Land Rover IDS and BM.W 3G for OEM diagnostics. CAN FD protocol is mainly for GM 2019+, DoIP protocol is mainly for Volvo 2018+, for L-and Rover/for Jaguar 2017+, for BM.W F chassis and G chassis.
- 🌎【Compatible with P-C/ WIND.OWS 】The Autel J2534 VCI can be connected to a compu.ter via a data cable; once the corresponding OEM software is installed, it enables do advanced progr.amming and c0ding on your vehicles. Easy Steps: 1) Connect to P-C via a USB cable 2) download OEM vehicle software 3) Start Diagnose. Take For.d for example, you can download OEM software on mot.orcraft.erservi.ce website, such as: For.d Diagnostic Software downloads, As B.uilt Data, Updated Cali.bration information, then use different software do relevant features.
- 🌎【Work with Autel Elite II Pro/ Ultra Lite/ MS909/ MS909CV/ MS909EV】This 2026 latest Autel J2534 Pass-Thru VCI is 100% compatible with Autel Elite II Pro Ultra Lite MS909 MS909CV MS909EV to perform advanced functions from diagnose to progra.mming.

- 【Advanced VCI Box, Industry-leading J2534 Pass-Thru Technology】This J2534 Pass-Thru Tool is designed espically designed for Professional Technicians and Advanced DIYers. This J2534 Pass-Thru device acts as a bridge between your vehicle and OEM software (sold separately), enabling dealership-level programming and diagnostics. It supports all J2534 protocols—including the latest DoIP and CAN FD—ensuring full compatibility with both legacy and next-generation vehicles.
- 【High-Speed OEM-Level Diagnostics and Functions】Unlock true OEM functionality with comprehensive system diagnostics, guided troubleshooting, coding, adaptations, resets, and rewriting—all designed to slash repair time. This all-in-one tool eliminates the need for multiple OEM devices, boosting efficiency and cutting costs. Equipped with High-Speed USB, it delivers 10x more data per second.
- 【Coverage for 8 Car Brands & Ultra Reliability】Compatible with Factory OEM Software.Fully supports J2534 protocols to work with Manufacturer subscriptions: for Chrysler, for Ford(Forscan), for GM, for Nissan, for Toyota, for Honda, for Fiat/Alfa Romeo/Lancia/Dodge/Ram/Jeep, and for VW/Audi. Backed by over 10000 real vehicle tests and benefit from a wealth of practical experience, this OEM J2534 tool guarantees stable and exceptional performance.
- 【User-Friendly RLink Platform & Expert Support】TOPDON’s proprietary driver management platform offers a clean interface and lifetime free updates. Access a rich library of real-world case studies to stay ahead of the curve. Backed by a support team with 10+ years of J2534 and automotive repair experience, we provide one-on-one assistance to resolve any technical issue. Note: This device requires a computer running Windows 7, 8, 10, or 11 (64-bit or later).
- 【6.6 ft USB-C Cable & Portable Storage Case】 The RLink J2534 diagnostic tool features a 6.6ft USB 2.0 Cable, allows to connection your computer easily outside the vehicle. The included handled carry case offers easy portability, storage, and hanging options—keeping your gear clean and ready to go, anywhere.
SEOCONTENT-START
TECHNICAL SERVICE BULLETIN 3.3L Duratec Hybrid/3.3L Duratec/3.0L EcoBoost – Operator Commanded Interior Cabin Heating For Virus Reduction 22-2290 20 July 2022 This bulletin supersedes 21-2359. Model: Ford 2020-2021 Explorer Engine: 3.0L EcoBoost Engine: 3.3L Duratec Engine: 3.3L Duratec Hybrid Summary This article supersedes TSB 21-2359 to update the Service Procedure. Issue: 2020-2021 Police Interceptor Utility vehicles equipped with a 3.3L Duratec, 3.3L Duratec Hybrid, or 3.0LEcoBoost engine have a module programming update that allows the operator to command a virus reducing heating procedure that, when combined with Centers for Disease Control and Prevention (CDC) guidelines, helps reduce virus counts inside the interior of Police Interceptor Utility vehicles. Follow the Service Procedure to perform the virus reducing heating procedure. NOTE: This is not a diagnostic routine and should not be used in any way to repair a vehicle. This procedure cannot be submitted on a warranty claim. This procedure is only intended for the first and second row seating areas. Ambient temperatures will affect this procedure. When performing this procedure, ambient temperatures should be above approximately 10°C (50°F). Weather conditions such as wind and rain may also affect the amount of time needed to perform the procedure. Action: Follow the Service Procedure on vehicles that meet all of the following criteria: • 2020-2021 Police Interceptor Utility vehicles • One of the following engine configurations: – 3.0L EcoBoost – 3.3L Duratec – 3.3L Duratec Hybrid Parts Service Part Number Quantity Description FPS-8262 1 Ford Authorized Modification Label Warranty Status: Information Only – Not Warrantable. Repair/Claim Coding Causal Part: IN Condition Code: 04 Service Procedure 1. Using the latest software level of the Ford Diagnosis and Repair System (FDRS), reprogram the powertrain control module (PCM), hybrid powertrain control module [if HEV] (HPCM/SOBDMC), body control module (BCM), the gateway module (GWM) and the heating, ventilation and air conditioning (HVAC) module. 2. Once the reprogramming is complete, reconfigure the HVAC module using the HVAC Configuration Application in the FDRS. 3. Once the reconfiguration is complete, the vehicle operator has the ability to command heating of the vehicle interior without further use of a diagnostic scan tool. 4. It is suggested to label the vehicle as having the update performed. Use the Ford Authorized Modification Label, to record the vehicle’s information. Virus Reducing Heating Procedure WARNING: Ford Motor Company is not responsible for any failure in following these instructions which may result in serious personal injury or damage to a vehicle. Performing this procedure will increase the interior temperature of the vehicle. Before performing this procedure, remove all occupants from the vehicle along with any equipment that should not be exposed to excessive heat. These may include, but are not limited to: personal items, cell phones, laptops, battery operated equipment, weapons, ammunition, oxygen tanks, backpacks, gas detectors, liquids, medical equipment, personal protective equipment and/or potentially flammable material. Make sure to exercise caution when entering the vehicle after this procedure has been performed. Interior surfaces will be hot. Exhaust gases will be generated during this procedure. Failure to perform this procedure in a well ventilated area could result in elevated concentrations of exhaust gases in and around the vehicle. CAUTION: Performing the interior cabin heating procedure has the possibility of inadvertently illuminating the tire pressure monitoring system (TPMS) and/or rear backup sensor warning indicator on the instrument panel cluster (IPC). Make sure to verify tire pressures are correct before starting this procedure. If a TPMS warning indicator remains illuminated after the interior cabin heating procedure has completed, and tire pressures are not low, drive the vehicle at speeds over 32 km/h (20 mph) for approximately 5 minutes to reset the TPMS. NOTE: This procedure is intended to be run on vehicles that follow all manufacturer suggested maintenance and with all fluid levels being set to manufacturer suggested levels. NOTE: Vehicle must have at least a 1/4 tank of fuel to perform the procedure. NOTE: If the Ford installed secure idle vehicle option is to be used in conjunction with this interior cabin heating procedure, make sure to press the secure idle button before entering this procedure. 1. Place the vehicle in park (P) in a well-ventilated area or in a garage with vehicle exhaust extraction equipment attached and properly functioning. 2. Is the engine at or near normal operating temperature (for 3.0L EcoBoost and 3.3L Duratec), or Ready to Drive (for 3.3L Duratec Hybrid)? (1). Yes – proceed to Step 3. (2). No – bring the engine up to normal operating temperature or Ready to Drive. 3. Make sure the hood, liftgate, doors, and windows are closed. NOTE: Do not open the hood, liftgate, doors, or windows while the procedure is in operation as it may extend or abort the procedure. 4. To maximize heat transfer to the second row seating area, open any sliding partitions and remove any first-to-second row barriers that can be easily detached or removed. 5. Make sure that all footwells and HVAC ducts are open and clear from any obstruction. This includes removing or relocating any loose items located under the front seats. 6. Make sure all instrument panel register vents are pointing directly towards the rear of the vehicle. NOTE: NOTE: To assist with this procedure, it is recommended that a partition, potentially made of foam board insulation, wood, cardboard, or equivalent be created and installed between the second row seating area and the cargo area. (Figure 1) Figure 1 7. Start the vehicle. 8. Using the cruise control setting buttons located on the steering wheel, press the buttons in the following sequence: Set+, Set-, Set+, Set-, On/Off, Cancel, On/Off, Cancel. WARNING: If the operator commanded interior cabin heating needs to be canceled for any reason, press the brake pedal using the operator’s foot. NOTE: Perform this sequence in rapid succession to initiate the procedure. NOTE: Do not touch any other vehicle inputs after entering the cruise control button sequence. Pressing any other buttons or driver inputs could cause this procedure to abort. NOTE: The vehicle operator may notice the speedometer moving along with the cruise control icon being illuminated. 9. Exit the vehicle. WARNING: Failure to exit the vehicle after initiating the procedure will result in exposure to dangerously high temperatures and could result in exposure to elevated concentrations of exhaust gases. NOTE: This procedure may last up to 2 hours. This largely depends on exterior and interior ambient temperature, initial engine temperature, and vehicle configurations such as partitions between the rows and rear climate. 10. The vehicle exterior lighting flashes in various patterns that indicate the different states of the procedure. (1). When the procedure is running, the hazards flash once indicating the procedure is in process. (2). When the procedure has ended, the reverse lights flash indicating the procedure has stopped. (3). A double hazard flash means the procedure successfully completed. (4). A triple hazard flash means the procedure aborted. WARNING: Make sure to exercise caution when entering the vehicle after this procedure has been performed. Interior surfaces will be hot. 11. After the procedure has completed, open the doors and windows to allow for a minimum of 5 minutes cooling time before entering the vehicle. 12. Turn the climate control system on and set it to A/C to assist with further cooldown. 13. After the vehicle has cooled, remove any temporary partitions installed for this procedure. Return any items removed from the vehicle.
**************************************************************************************************************
SEOCONTENT-END
This product presentation was made with AAWP plugin.