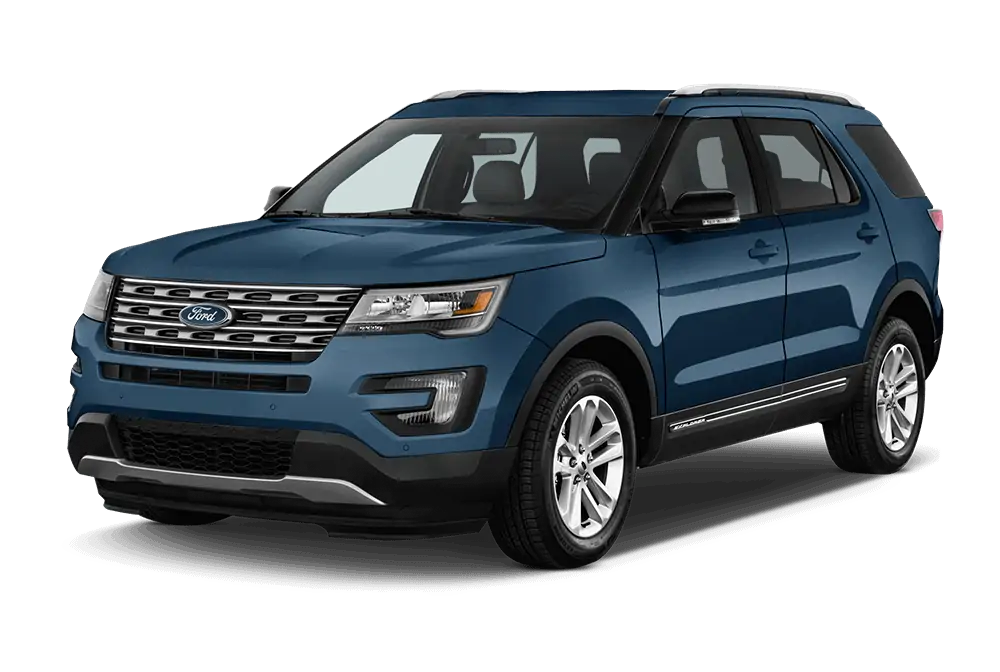
| TECHNICAL SERVICE BULLETIN Body Creak/Pop Noise Over Bumps – Right Front Subframe Bolt Area – Built On Or Before 31-Jan-2016 | 18-2239 13 August 2018 |
This bulletin supersedes 16-0021. Reason for update: New Part/Procedure For Same Condition
Model:
| Ford
2016 Explorer |
Summary
This article supersedes TSB 16-0021 to update the Service Procedure.
Issue: Some 2016 Explorer vehicles built on or before 31-Jan-2016 may exhibit a pop or creak noise from the right front mounting bolt of the front subframe. This condition may be due to a mispositioned weld between the barrel nut and the subframe mounting bracket.
Action: Follow the Service Procedure steps to correct the condition.
Parts
| Part Number | Description | Quantity |
| Obtain Locally | ValuGard™ Rust Inhibitor, VG-104/VG-104A | 1 |
| Obtain Locally | ValuGard™ Premium Undercoating, VG-101/VG-101A | 1 |
Warranty Status: Eligible Under Provisions Of New Vehicle Limited Warranty Coverage Warranty/ESP coverage limits/policies/prior approvals are not altered by a TSB. Warranty/ESP coverage limits are determined by the identified causal part and verified using the OASIS part coverage tool.
Labor Times
| Description | Operation No. | Time |
| 2016 Explorer: Diagnose And Repair The Front Subframe Following The Service Procedure (Do Not Use With Any Other Labor Operations) | 182239A | 1.3 Hrs. |
Repair/Claim Coding
| Causal Part: | 16054 |
| Condition Code: | 01 |
Service Procedure
The steps below will add an additional weld to eliminate the possibility of the barrel nut creak/pop noise.
1. Attach Rotunda Wireless Chassis Ears JSP97202 or equivalent to the subframe. Does diagnosis with the chassis ears indicate the noise is originating from the right front mounting bolt of the front subframe?
(1). Yes – proceed to Step 2.
(2). No – this article does not apply. Refer to Workshop Manual (WSM), Section 100-04 for normal diagnostics.
2. Disconnect the negative battery cable. Refer to WSM, Section 414-01.
3. Remove the right front wheel and tire assembly. Refer to WSM, Section 204-04.
4. Remove the right side fender splash shield. Refer to WSM, Section 501-02.
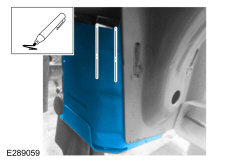
5. Locate the front subframe bolt mounting tower bracket on the right side frame member and mark 2 cut lines approximately 63 mm (2.50 in) long as shown. (Figure 1)
Figure 1
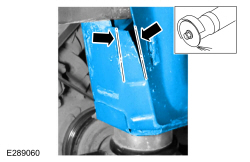
6. Using an abrasive cut off wheel, cut the bracket sheet metal along the marked lines. (Figure 2)
(1). Make sure to only cut through the outer layer.
Figure 2
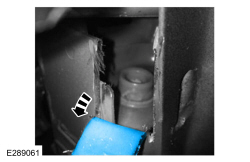
7. Position the sheet metal out of the way to allow access to the barrel nut. (Figure 3)
Figure 3
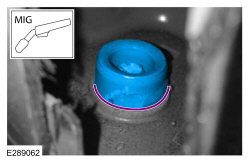
8. Using a MIG welder, weld the barrel nut to the bracket along the seam. The weld bead should span as far along the seam as possible. Refer to WSM, Section 501-25 Body Repairs – General Information > General Procedures > Welding Precautions. (Figure 4)
Figure 4
9. Position the sheet metal back to the original location.
10. Prepare the area for welding by grinding and cleaning.
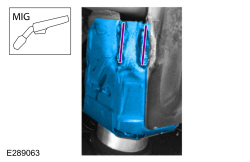
11. Using a MIG welder, weld the previously cut sheet metal to repair the bracket. (Figure 5)
Figure 5
12. Clean the welded area to prepare it for corrosion protection.
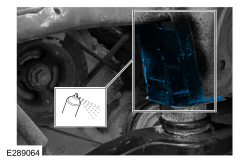
13. Apply ValuGard™ Premium Undercoating or equivalent corrosion protection to the repaired cut line area. Refer to WSM, Section 501-25. (Figure 6)
Figure 6
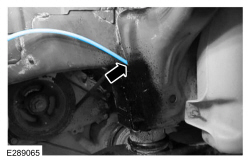
14. Apply ValuGard™ Rust Inhibitor or equivalent to the welded barrel nut. Refer to WSM, Section 501-25.
(1). Use an appropriate spray nozzle to access the cavity. (Figure 7)
Figure 7
15. Install the right side fender splash shield. Refer to WSM, Section 501-02.
16. Install the right front wheel and tire assembly. Refer to WSM, Section 204-04.
17. Reconnect the negative battery cable. Refer to WSM, Section 414-01.
18-2239
13 August 2018
- Perfect for use on bare or primed metal underbodies of cars, trucks, trailers, RVs and more
- Rubberized formula protects against corrosion and damage from water, salt and other chemicals
- Dries to the touch in 30 minutes and covers up to 10-12 sq. ft. per can
- Undercoating helps deaden sound and reduce damage to parts
- Features a wide, comfort spray tip and any-angle spray technology for easy painting even upside down


- Perfect for use on bare or primed metal underbodies of cars, trucks, trailers, RVs and more
- Professional-grade formula provides superior protection against corrosion and damage from water, salt and other chemicals
- Dries to the touch in 1 hour and covers up to 10-15 sq. ft. per can
- Undercoating helps deaden sound and reduce damage to parts
- Features a wide, comfort spray tip and any-angle spray technology for easy painting even upside down

- Perfect for use on bare or primed metal underbodies of cars, trucks, trailers, RVs and more
- Professional-grade formula provides superior protection against corrosion and damage from water, salt and other chemicals
- Dries to the touch in 1 hour and covers up to 10-15 sq. ft. per can
- Undercoating helps deaden sound and reduce damage to parts
- Features a wide, comfort spray tip and any-angle spray technology for easy painting even upside down

- The information below is per-pack only
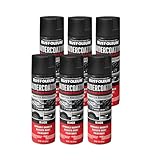
- VERSATILE AUTOMOTIVE UNDERCOATING: Perfect for use on bare or primed metal underbodies of cars, trucks, trailers, RVs and more
- LONG-LASTING RUST PROTECTION: Rubberized formula protects against corrosion and damage from water, salt and other chemicals
- EXCELLENT COVERAGE & FAST DRYING: Dries to the touch in 30 minutes and covers up to 10-12 sq. ft. per can
- REDUCES ROAD NOISE: Undercoating helps deaden sound and reduce damage to parts

- Easy to use spray seals and protects metal surfaces from corrosion and moisture
- Flexible, rubberized coating provides superior chemical and abrasion resistance
- Dries to touch in 1-2 hours and covers 85-175 sq. ft. per qt. with rust protection
- Apply by brush, roller or spray to repair rust problems and prevent future issues
- Creates a protective coating with no shine, flat finish on rusted or bare metal
This product presentation was made with AAWP plugin.