This article supersedes TSB 16-0165 to add a causal basic part number and condition code.
ISSUE:
Some 2011-2015 Explorer vehicles may exhibit an exhaust odor in the vehicle with the auxiliary climate control system on. Customers may indicate the odor smells like sulfur, or that exhaust odors are entering the vehicle cabin. This condition may be worsened when the climate control system is in recirculate mode and the vehicle is heavily accelerated for an extended period. Whether and to what extent any customer or occupant of a 2011-2015 Explorer vehicle experiences the exhaust odor will be affected by driving habits, weather and individual sensitivities.
ACTION:
Follow each and every step of the Service Procedure in procedure 1 to improve the condition.
SERVICE PROCEDURES
Note: The Service Procedure consists of 2 separate repair routines. Most vehicles will not require the second procedure.
Procedure 2 does not apply to vehicles equipped with the 2.0L Gasoline Turbocharged Direct Injection (GTDI) and 3.5L GTDI engines.
Note: The body sealing steps in this procedure are critical elements in helping to manage subjective odor concerns.
Is the customer returning with the exhaust odor complaint after Procedure 1 was completed?
No – proceed to Procedure 1.
Yes – Is the vehicle equipped with the 3.5L Twin Independent Variable Cam Timing (Ti-VCT) engine?
Yes – proceed to Procedure 2.
No – the procedure does not apply. Continue with normal diagnostics.
PROCEDURE 1
Reprogram the heating ventilation air conditioning (HVAC) module to the latest calibration using IDS release 101.03 or higher. Make sure you are connected to the internet when entering module programming to obtain the latest updates. Calibration files may also be obtained at www.motorcraftservice.com.
When reprogramming the HVAC, IDS will have additional questions which will require a yes response to reprogram the module.
Remove the left and right tail lamps. Refer to WSM, Section 417-01.
Remove the wheel lip mouldings. Refer to WSM, Section 501-08.
Open the liftgate and inspect for presence of drain valves in the two (2) drain holes on the left and right side of the liftgate. Are the drain valves present? (Figure 1) Figure 1
Yes – proceed to Step 7.
No – proceed to Step 6.
Install a new drain valve in each of the two (2) drain holes on the left and right side of the liftgate. (Figure 1)
Inspect the liftgate seal for damage and proper fit/contact pattern. Adjusting the rear liftgate striker so that the rear hatch seals tighter to the liftgate seal is important. This can be done by loosening the striker and moving it to increase the liftgate sealing pressure.
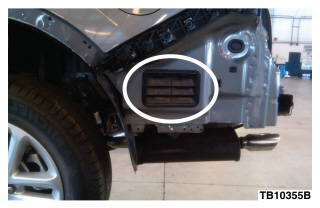
Inspect the left and right side air extractors for proper fit to the body and operation/sealing of the rubber flaps.
Replace the air extractor if it is warped or damaged or flaps do not lay flush to their sealing surface. (Figure 2)
Figure 2
Inspect and verify proper installation of the wire harness grommets and body plugs in the liftgate opening, quarter panels under the tail lamps, license plate and bumper cover and the rear underbody area.
Make sure to tape off only the vents and not the area around the air extractor where it seals to the body of the vehicle.
Start the vehicle and set the front climate control to fresh air mode and front blower speed to HI. Turn the rear climate control off.
Make sure all windows are up and all doors are closed in order to pressurize the cabin.
Use soapy water (dish soap or bubble bath works best-not bar soap) in a spray bottle to help locate air leaks.
Spray the underbody seams, rubber grommets, rear wheel well seams, tail lamp seams, liftgate seals, quarter glass seals, license plate area, liftgate hinge area, auxiliary a/c seals and the area where air extractors mount in the body.
Air leaks will be identified by the presence of air bubbles. Mark the location of any leaks.
Turn off the a/c and shut the vehicle off.
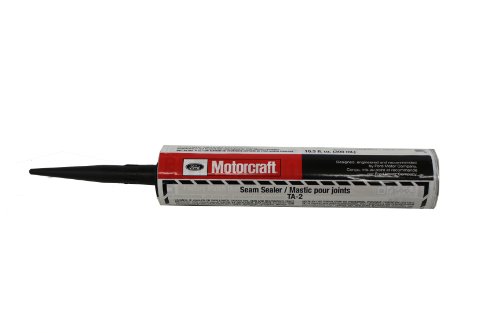
Clean and dry all marked areas and seal using Motorcraft Seam Sealer.
Raise the vehicle on a hoist. Refer to WSM, Section 100-02.
Lower and support the rear section of the exhaust system.
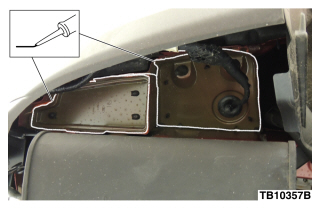
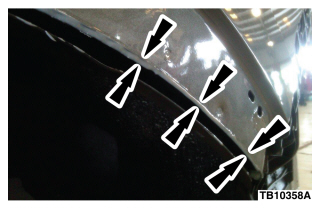
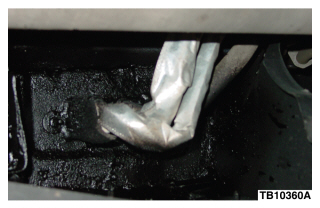
Clean areas on the underside of the vehicle where seam sealer will be applied. (Figures 3-5)
Remove the tape from the air extractors and auxiliary climate control drain.
Install the rear exhaust system.
Install the wheel lip mouldings. Refer to WSM, Section 501-08.
Install the rear bumper cover. Refer to WSM, Section 501-19.
Apply masking tape around the outer edge of the rear fender mouldings to protect the vehicle from damage.
Install the tail lamps. Refer to WSM, Section 417-01.
Is the vehicle equipped with the 3.5L Ti-VCT engine?
Yes – return the vehicle to the customer for evaluation, close out the repair order and submit the claim for payment.
Procedure 2 can be performed if the customer returns with the same complaint.
No – return the vehicle to the customer, close out the repair order and submit claim for payment.
Procedure 2 does not apply to the vehicle.
PROCEDURE 2
Click here to access Guided Routine. Does the vehicle meet necessary conditions?
Yes – proceed to Step 2.
No – return vehicle to the customer. No additional repairs are available.
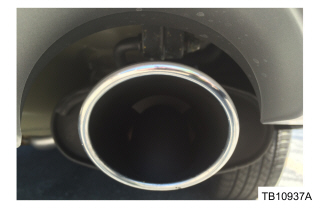
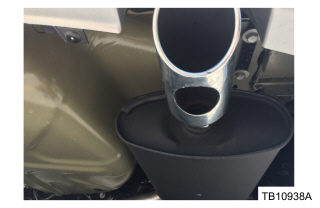
Inform the customer of the redesigned exhaust tips and that appearance will remain the same but the exhaust will exit the tip from bottom. Upon acceptance, replace the muffler assembly with the updated part containing the down turned exhaust tips. (Figures 7-8)
2011-2015 Explorer 3.5L Ti-VCT: Perform Web Assessment, Obtain Repair Verification Code (RVC) And Replace The Muffler Assembly Following Procedure 2 (Do Not Use With Any Labor Operations Outside Of This Article)
0.7 Hr.
MT160166
2011-2015 Explorer: Reseal The Body Following Procedure 1 Includes Time To Reprogram The HVAC Module (Do Not Use With Any Labor Operations Outside Of This Article)
Actual Time
WARRANTY STATUS
Eligible Under Provisions Of New Vehicle Limited Warranty Coverage.
Warranty/ESP coverage limits/policies/prior approvals are not altered by a TSB. Warranty/ESP coverage limits are determined by the identified causal part and verified using the OASIS part coverage tool.
Software necessary to program electronic modules to the latest calibrationlevel, perform module initialization (PATS), and set Programmable Parameters on Ford, Lincoln and Mercury vehicles.
Ford Module Programming (FMP) is a software application that allows subscribers to program electronic modules on Ford, Lincoln and Mercury vehicles. It can be used for:
Reprogramming emission-related (OBDII) modules on some vehicles manufactured in 1995 and all vehicles manufactured from 1996 to the present
Reprogramming or reconfiguring non-emission-related modules on many vehicles (UBP and MS-CAN not supported)
In addition, module initialization (PATS) functions such as Keycode Erase/Reprogram and PCM Parameter Reset can be done using this application.
ALL OF THE J2534 PROTOCOLS - This single unit has all of the protocols you need for your OEM J2534reprogramming and diagnostics including the latest in DoIP and CanFD
J2534 TECHNICAL SUPPORT - FREE for the life of the tool. Staffed by technicians who understand vehicle repair and J2534 Pass‑thru
TOOLBOX WITH OEM APPLICATION DESCRIPTIONS - educational video tutorials and real-time news – Giving you the confidence and up-to-date knowledge to get the job done
J2534 v05.00 API - The newest version of J2534 to give you the latest in pass-thru technology
FUTURE PROOF WITH 4 CAN CHANNELS - Going beyond the 3 required by select Chrysler/FCA models, CarDAQ-Plus 3 also provides a 4th to meet the needs of future OEM applications
Delivers serious jump-starting power with 1000 peak amps and 500 instant starting amps
Reverse polarity alarm alerts when there is an improper connection; Connect the clamps to the battery, turn on the switch and start your vehicle. All Metal Powder Coated Clamps
Features a 120 PSI air compressor to help inflate tires with low pressure; High-powered LED light rotates 270 degrees to help you work in the dark
Built-in 12V DC outlet and USB port provide portable power for electronic devices; Includes a limited 1 year manufacturer warranty
Jump starter should be charged every 30 days when not in use; Charges using a standard household extension cord (sold separately)
This product presentation was made with AAWP plugin.