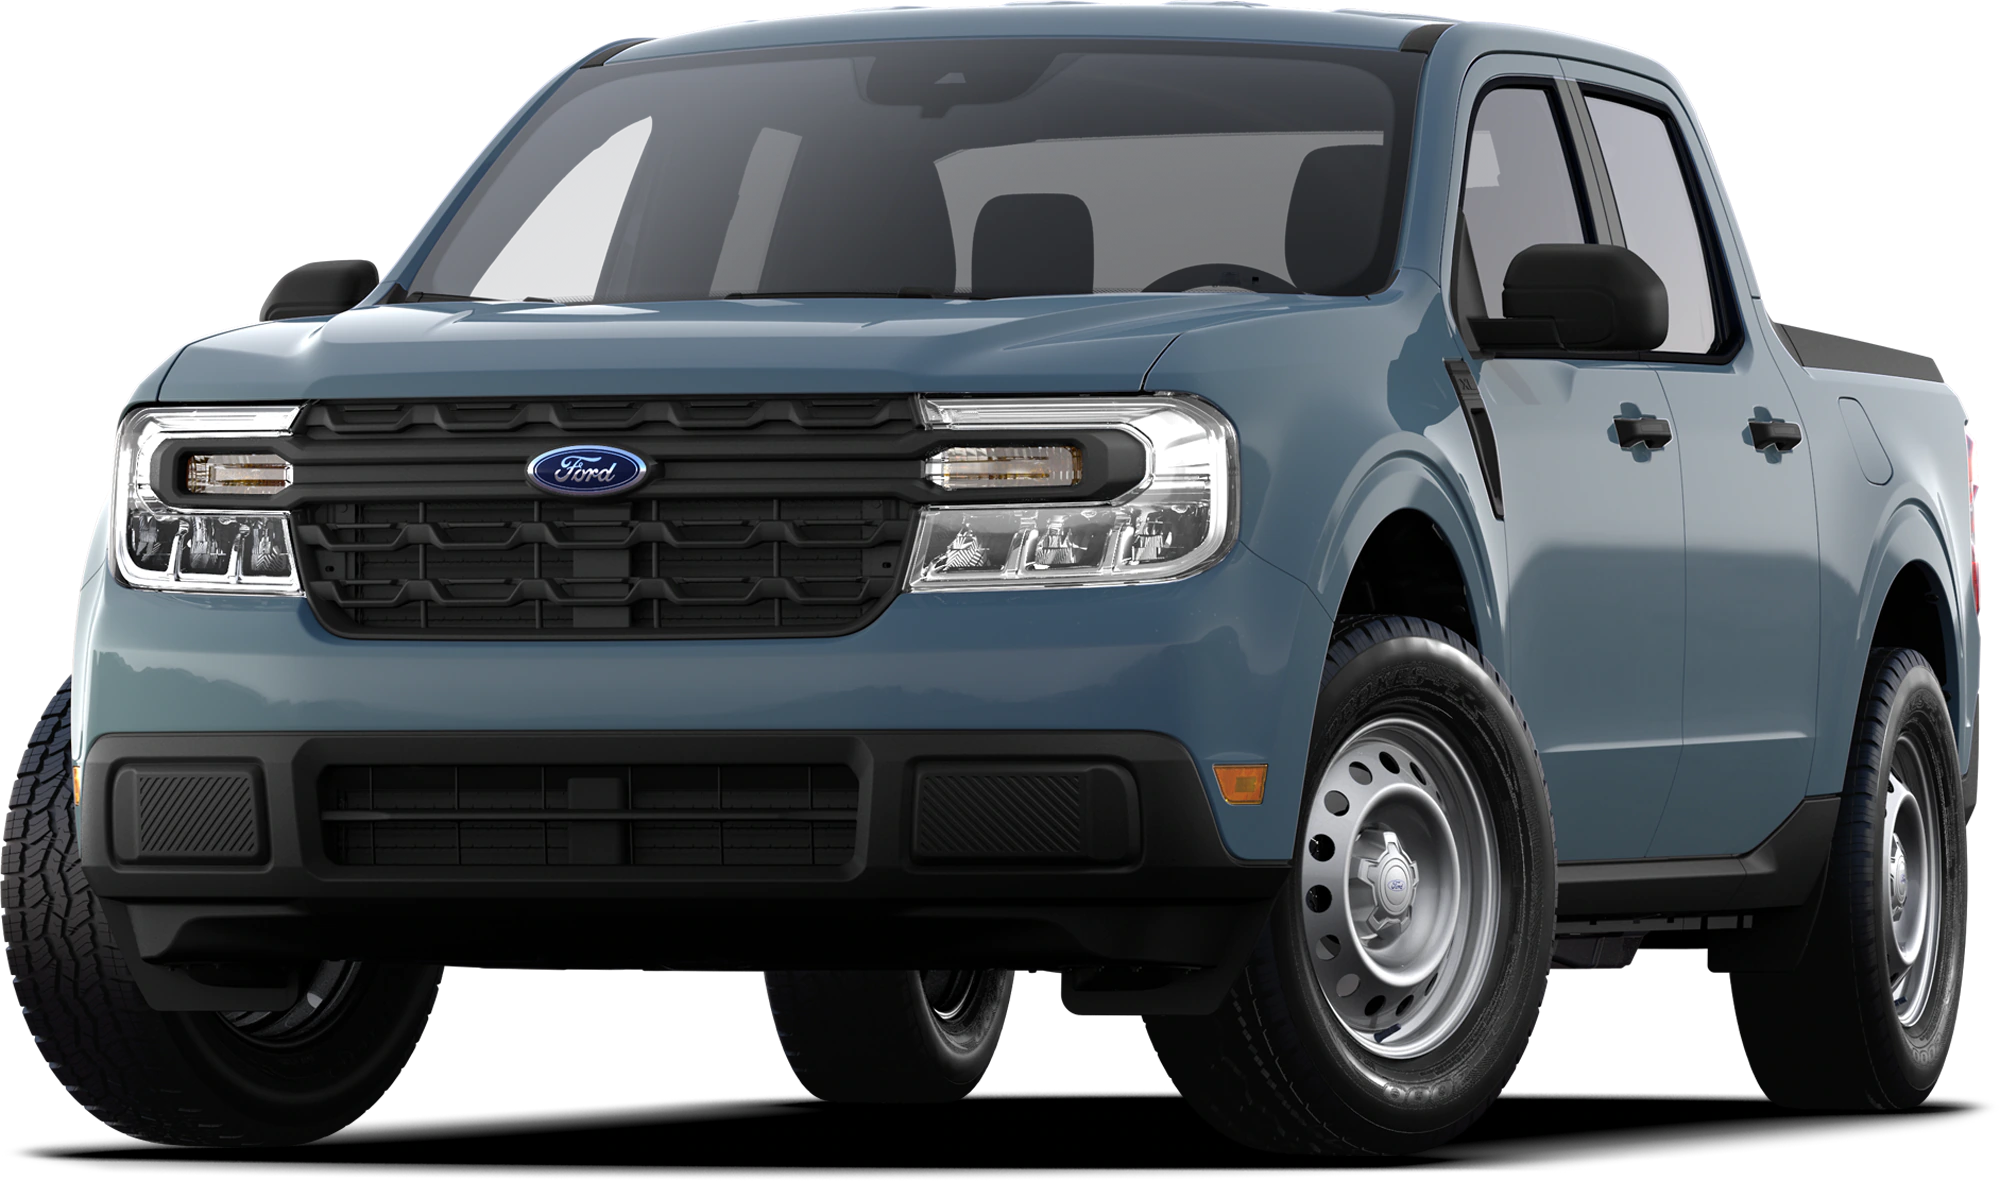
August 8, 2022 NHTSA CAMPAIGN NUMBER: 22V594000
Side Curtain Air Bag Malfunction/FMVSS 226
Improper deployment of an air bag increases the risk of injury in a crash.
NHTSA Campaign Number: 22V594
Manufacturer Ford Motor Company
Components AIR BAGS
Potential Number of Units Affected 64,974
Summary
Ford Motor Company (Ford) is recalling certain 2022 Maverick vehicles. The side-curtain air bags may not deploy properly. As such, these vehicles fail to comply with the requirements of Federal Motor Vehicle Safety Standard number 226, “Ejection Mitigation.”
Remedy
Dealers will replace the left and right side-curtain air bag modules with a new design, free of charge. Interim owner notification letters informing owners of the safety risk were mailed September 23, 2022. Remedy parts are expected to become available in January 2023. Owner notification letters were mailed January 30, 2023. Owners may contact Ford customer service at 1-866-436-7332. Ford’s number for this recall is 22C20.
Notes
Owners may also contact the National Highway Traffic Safety Administration Vehicle Safety Hotline at 1-888-327-4236 (TTY 1-800-424-9153), or go to www.nhtsa.gov.
Check if your Vehicle has a Recall
January 25, 2023
NEW VEHICLE DEMONSTRATION / DELIVERY HOLD
Compliance Recall 22C20 – Supplement #1
Certain 2022 Model Year Maverick
Side Airbag Curtain Replacement
REASON FOR THIS SUPPLEMENT
- Technical Instructions: Repair procedure updated for clarity.
- Parts Requirements/Ordering Information: The seed stock program has been lifted. Parts ordering through SSSC is still required.
AFFECTED VEHICLES
| Vehicle | Model Year | Assembly Plant | Build Dates |
| Maverick | 2022 | Hermosillo Plant | February 3, 2021, through July 9, 2022 |
Affected vehicles are identified in OASIS and FSA VIN Lists.
Note: Some vehicles may be in the process of being repaired at the plant. Monitor OASIS before opening an RO and/or beginning a repair. Parts purchased for an FSA can be returned for credit, if required. See the EXCESS STOCK RETURN details in Attachment II for more information.
REASON FOR THIS COMPLIANCE RECALL
All the affected vehicles may not conform to the requirements specified by Federal Motor Vehicle Safety Standard (FMVSS) No. 226 Ejection Mitigation for front-row passengers, a vehicle that does not comply with FMVSS 226 increases the risk of injury in a crash.
SERVICE ACTION
Before demonstrating or delivering any new in-stock vehicles involved in this recall, dealers are to replace both side airbag curtains. This service must be performed on all affected vehicles at no charge to the vehicle owner.
OWNER NOTIFICATION AND MAILING SCHEDULE
Remedy owner letters are expected to be mailed mid-1st quarter of 2023.
PLEASE NOTE:
Federal law requires dealers to complete this recall service before a new vehicle is delivered to the buyer or lessee. Violation of this requirement by a dealer could result in a civil penalty of up to $26,315 per vehicle. Correct all vehicles in your new vehicle inventory before delivery.
SOLD VEHICLES
- Ford has not issued instructions to stop driving used vehicles under this compliance recall.
STOCK VEHICLES
- Correct only affected units with sales contracts at this time in new vehicle inventory before delivery. Dealers will be notified when enough parts are in inventory to repair all affected units
- Use OASIS to identify any affected vehicles in your used vehicle inventory.
DEALER-OPERATED RENTAL VEHICLES
The Fixing America’s Surface Transportation (FAST) Act law effective June 2016 prohibits a rental company from selling, renting, or leasing vehicles subject to a safety or compliance recall. Please consult your legal counsel for legal advice.
TITLE BRANDED / SALVAGED VEHICLES
Affected title-branded and salvaged vehicles are eligible for this recall.
OWNER REFUNDS
- This safety recall must still be performed, even if the owner has paid for a previous repair. Claiming a refund will not close the recall on the vehicle.
- Ford Motor Company is offering a refund for owner-paid repairs covered by this recall if the repair was performed before the date indicated in the reimbursement plan, which is posted with this bulletin. Owners are directed to seek reimbursement through authorized dealers or, at their option, directly through Ford Motor Company at P.O. Box 6251, Dearborn, MI 481216251.
- Dealers are also pre-approved to refund owner-paid emergency repairs that were performed away from an authorized servicing dealer after the end date specified in the reimbursement plan. Non-covered repairs, or those judged by Ford to be excessive, will not be reimbursed.
- Refunds will only be provided for the cost associated with the side airbag replacement.
RENTAL VEHICLES
Rental vehicles are not approved for this program.
Special Program Part Ordering.
To place an order for side airbag curtains, submit an open R.O. number and VIN-specific Part Order contact via the SSSC Web Contact Site.
| Part Number | Description | Order Quantity | Claim Quantity |
| NZ6Z-26042D94-B | Curtain Assembly – RH | 1 | 1 |
| NZ6Z-26042D95-B | Curtain Assembly – LH | 1 | 1 |
| W710947-S450 | Bolt (4 in package) | 1 | 2 |
CERTAIN 2022 MODEL YEAR MAVERICK VEHICLES — DRIVER AND PASSENGER SIDE CURTAIN AIRBAG REPLACEMENT
SERVICE PROCEDURE
1. On both sides remove the A-pillar trim panels. Please follow the Workshop Manual (WSM) procedures in Section 501-05.
2. On both sides remove the B-pillar lower trim panels. Please follow the WSM procedures in Section 501-05.
3. Depower Supplemental restraint System (SRS). Please follow the WSM procedures in Section 501-20B.
4. Position the front seatbelt anchor and pretensioner aside, disconnect the front seatbelt anchor and pretensioner electrical connector and remove the front seatbelt anchor and pretensioner bolt. See Figure 1.
- Torque: 40 Nm (30 lb.ft).
NOTE: Left Hand (LH) side shown, Right Hand (RH) side similar.
5. On both sides remove the B-pillar upper trim panel bolt. See Figure 2.
- Torque: 9 Nm (80 lb.in).
NOTE: LH side shown, RH side similar.
6. On both sides release the B-pillar upper trim panel lower clip. See Figure 3.
NOTE: LH side shown, RH side similar.
NOTICE: The B-pillar upper trim panel must be positioned downward to allow the upper clips to release correctly. Failure to follow this direction may cause damage to the B-pillar upper trim panel.
7. On both sides slide the B-pillar upper trim panel down, aligning the clips to the slots in the sheet metal. See Figure 4.
NOTE: LH side shown, RH side similar.
8. On both sides pull outward on the B-pillar upper trim panel, feed the front seatbelt retractor and pretensioner through the opening in the B-pillar upper trim panel and remove the B-pillar upper trim panel. See Figure 5.
NOTE: LH side shown, RH side similar.
9. On both sides adjust the position of the B-pillar Slider downward, pull the slider down to the lower position and engage the B-side hook into the pocket. See Figure 6.
NOTE: LH side shown, RH side similar.
10. On both sides pull the height adjuster downward to the lower position and adjust the position of the height adjuster downward. See Figure 7.
NOTE: LH side shown, RH side similar.
11. On the LH side disconnect the headliner wiring harness electrical connector, release the headliner wiring harness from the A-pillar and position the headliner wiring harness aside. See Figure 8.
12. On both sides position the sun visor bolt cover aside, remove the sun visor bolt, rotate the sun visor end down and rearward to remove from headliner, if equipped disconnect the sun visor electrical connector and remove the sun visor. See Figure 9.
NOTE: LH side shown, RH side similar.
13. On both sides remove the bolt and the sun visor clip. See Figure 10.
NOTE: LH side shown, RH side similar.
14. Release the clips and remove the Image Processing Module A (IPMA) cover. See Figure 11.
NOTE: Interior rear view mirror removed for clarity.
15. Disconnect the in-vehicle temperature and humidity sensor electrical connector, the IPMA electrical connector and the IPMA windshield heater grid electrical connector. See Figure 12.
16. On the RH side disconnect the headliner wiring harness electrical connector, release the headliner wiring harness from the A-pillar and position the headliner wiring harness aside. See Figure 13.
17. On the RH side position the front assist handle down, remove the front assist handle retainers and remove the front assist handle. See Figure 14.
18. On both sides position the rear assist handle down, remove the rear assist handle retainers and remove the rear assist handle. See Figure 15.
NOTE: LH side shown, RH side similar.
NOTE: For this procedure only DO NOT remove the C-Pillar upper trim panel.
19. Release the headliner rear clips. See Figure 16.
NOTE: C-Pillar upper trim panel removed for clarity.
NOTE: The use of an assistant is recommended to support the front of the headliner while the rear is being lowered around the C-Pillar upper trim panel.
20. Lower the headliner. See Figure 17.
21. Remove the driver and passenger side Side Curtain Airbags. Please follow the WSM procedures in Section 501-20B.
22. On both sides of the headliner, remove and discard the foam block located rearward of the B-Pillar upper trim panel. See Figures 18 and 19.
23. On both sides of the headliner, measure inward 0.11 in (3mm) across the three triangular notches from the edge of the headliner rearward of the B-Pillar upper trim panel and using a suitable tool remove the excess material including the three triangular notches. See Figure 20.
NOTE: RH side shown, LH side similar.
NOTE: Excess fabric is acceptable and will be covered when the B-Pillar is reinstalled. See Figure 21.
24. On both sides of the front of the headliner, locate the large foam block on the outboard edge of the headliner. Measure from the top of the foam block inward 0.28 in (7mm) and mark the foam block.
Using a suitable tool cut from the marked area to the top of the foam block. See Figure 22.
NOTE: RH side shown, LH side similar.
25. On both sides of the vehicle remove and discard the A-Pillar bolt. See Figure 23.
NOTE: This hole will be used when installing the new side curtain airbags.
NOTE: RH side shown, LH side similar.
26. Slide the new side curtain airbag rearward, engaging the retainer to the sheet metal, then rotate the side curtain airbag and attach the retainer. See Figure 24.
NOTE: LH side shown, RH side similar.
27. Install the side curtain airbag rear bolts in the sequence shown. See Figure 25.
- Torque: 9 Nm (80 in.lb).
NOTE: LH side shown, RH side similar.
28. Attach the new side curtain airbag to the hangers in the sequence shown. See Figure 26.
NOTE: LH side shown, RH side similar.
29. Using the new 50 torx plus bolt attach the new side curtain airbag lower tether and hand tighten the bolt. See Figure 27.
NOTE: LH side shown, RH side similar.
30. Attach the new side curtain airbag hanger. See Figure 28.
NOTE: LH side shown, RH side similar.
31. Attach the new side curtain airbag hangers. See Figure 29.
NOTE: Ensure that the upper tether is not twisted during installation.
NOTE: LH side shown, RH side similar.
32. Attach the new side curtain airbag pin-type retainer. See Figure 30.
NOTE: RH side shown, LH side similar.
33. Using the new 50 torx plus bolt attach the new side curtain airbag lower tether. See Figure 31.
- Torque: 47.5 Nm (35 lb.ft).
NOTE: RH side shown, LH side similar.
34. Install the side curtain airbag nuts. See Figure 32.
- Torque: 9 Nm (80 in.lb).
NOTE: RH side shown, LH side similar.
35. Connect the side curtain airbag electrical connector and ensure that the spring-loaded locking tabs have engaged. See Figure 33.
NOTE: RH side shown, LH side similar.
NOTE: The use of an assistant is recommended to support the front of the headliner while the rear is being installed around the C-Pillar upper trim panel.
36. Install the headliner by reversing Steps 1-20.
NOTE: When installing the B-Pillar upper trim ensure the correct connection between the height adjuster and B-Pillar upper trim. See Figure 34.
NOTE: When reassembled, ensure that the B-pillar clips are correctly inserted in the T shape slots. An audible “click” must be heard when correctly reassembled. See Figure 35.
38. Slide the B-Pillar Upper Trim, Up and Down three times to ensure they were properly assembled. See Figure 36.
39. Inspect and position the front and rear door weather strip lips so that they overlap the top of the B-pillar upper trim panel. See Figure 37.
40. Repower the SRS. Please follow the WSM procedures in Section 501-20B.
41. Check the seatbelt system for correct operation. Please follow the WSM procedures in Section 501-20A.
IMPORTANT NOTE: Federal law prohibits selling motor vehicle parts or components that are under safety, compliance, or emissions recall. Unless a part is requested to be returned to Ford, all parts replaced under this FSA must be scrapped in accordance with all applicable local, state and federal environmental protection and hazardous material regulations. Refer to the Parts Retention, Return, & Scrapping section of the FSA dealer bulletin for further information.
Chronology :
NHTSA’s Office of Vehicle Safety Compliance contacted Ford on June 29, 2022, regarding the results of their FMVSS 226 compliance audit on the 2022 model year Maverick. The displacement results for the front lower primary target was 111.9 mm which exceeds the federal regulation of 100 mm.
Ford’s certification test from December 2020 indicates a displacement of 82.5 – 88.4 mm which meets the regulation of 100 mm and the Ford Acceptance Criteria (FAC) of 93.1 m.
Ford’s investigation included analyzing raw data from the NHTSA test vehicle and comparing it to the raw data from the Ford certification test vehicle. Ford’s analysis of all the NHTSA test data has not identified an explanation for the total difference in performance between the NHTSA test vehicle and the Ford certification test vehicle.
In July 2022, Ford conducted FMVSS 226 certification testing, including the front lower primary target, on a 2022 model year Maverick equipped with new current batch side curtain air bags from the assembly plant. The displacement results of three samples tested at the front lower primary target were between 102 and 107.3 mm. The data from this recent test was compared to the data in Ford’s certification test from December 2020 and there were no root causes identified to explain the difference in performance. The root cause analysis is still under investigation.
A Stop Ship was issued at Ford’s Hermosillo Assembly Plant (HSAP) on July 12, 2022.
Throughout this investigation, Ford and NHTSA discussed daily the status of Ford’s testing, test results, and conclusions.
On August 1, 2022, Ford’s Field Review Committee reviewed the concern and approved a field action.
Ford is not aware of any accidents or injuries relating to this condition.
October 20, 2022 Update: Ford revised the owner notification dates for parts availability.
1 Affected Product
Vehicle
| MAKE | MODEL | YEAR |
| FORD | MAVERICK | 2022 |
11 Associated Documents
Recall Acknowledgement
RCAK-22V594-3217.pdf 651.224KB
Noncompliance Notice 573 Report
RCLRPT-22V594-7101.PDF 215.398KB
Manufacturer Notices(to Dealers,etc) – Dealer Notice re NEW VEHICLE DEMONSTRATION / DELIVERY HOLD – Advance Notice Compliance Recall 22C20 Certain 2022 Model Year Maverick Side Airbag Curtain Replacement
ISSUED Interim Owner Notification Letter(Part 577)
RIONL-22V594-9476.pdf 44.039KB
Recall 573 Report – 10/24/22
RCLRPT-22V594-9526.PDF 215.587KB
Recall 573 Report – 8/9/22
RCLRPT-22V594-5090.PDF 215.41KB
Recall 573 Report – 8/9/22
RCLRPT-22V594-5088.PDF 215.41KB
Manufacturer Notices(to Dealers,etc) – Dealer Bulletin re NEW VEHICLE DEMONSTRATION / DELIVERY HOLD Compliance Recall 22C20 Certain 2022 Model Year Maverick Side Airbag Curtain Replacement
RCMN-22V594-1355.pdf 5941.087KB
Manufacturer Notices(to Dealers,etc) – Dealer Bulletin re NEW VEHICLE DEMONSTRATION / DELIVERY HOLD Compliance Recall 22C20 – Supplement #1 Certain 2022 Model Year Maverick Side Airbag Curtain Replacement
RCMN-22V594-9546.pdf 10909.71KB
ISSUED Owner Notification Letter(Part 577)
RCONL-22V594-3785.pdf 52.219KB
Recall Quarterly Report #1, 2023-1
RCLQRT-22V594-1551.PDF 211.141KB
Latest Recalls Documents
- [Easy to Use—Work Out of the Box] + [FOXWELL 2026 New Version] FOXWELL NT604 Elite scan tool is the 2026 new version from FOXWELL, designed for car owners who want to figure out the cause of issues before fixing car problems by scanning common systems like ABS, SRS, engine, and transmission. The NT604 Elite obd2 scanner diagnostic tool comes with the latest software—no need to waste time downloading software first. Plug the scanner into the OBDII port with OBDII cable to start the diagnosis.
- [Affordable] + [Reliable Car Health Monitor] Will you be confused what happens when the warning light of ABS/SRS/transmission/check engine flashes? Instead of taking your cars to dealership, this FOXWELL scanner will help you do a thorough scanning and detection for your cars and pinpoint the root cause. Note:The device is a diagnostic tool, not a repair tool. To turn off a warning light, you must first physically repair the issue causing it. Only then can the scanner be used to clear the corresponding fault code.
- [5 in 1 Car Diagnostic Scanner] Compared with obd scanners (50-100), NT604 Elite code scanner not only includes their OBDII diagnosis but also serves as ABS/SRS scanner, transmission and check engine code reader. When it’s an odb2 scanner, you can use it to check if your car is ready for annual test through I/M readiness menu. In addition, live data stream, built-in DTC library, data play back and print, all these features are a big plus for it. Note: doesn't support maintenance functions like reset or relearn. For the SRS system, NT604 Elite can read and clear common fault codes not caused by a crash, but crash/collision data cannot be cleared.
- [Fantastic AUTOVIN] + [No extra software fee] Through the AUTOVIN menu, this NT604 Elite car scanner allows you to get your V-IN and vehicle info rapidly, no need to take time to find your V-IN and input one by one. What's more, the NT604 Elite ABS SRS scanner supports 60+ car brands from worldwide (America/Asia/Europe). You don’t need to pay extra software fee. AUTOVIN may not work on some older vehicles or certain vehicle brands. If AUTOVIN fails, please input the vin code manually or go to the Diagnostic Menu to select your vehicle model.
- [Solid protective case KO plastic carrying bag] + [Lifetime update] Almost all same price-level car scanner diagnostic tool only offers plastic bag to hold the scanner.However, NT604 Elite automotive scanner is equipped with solid protective case, preventing your obd2 scanner from damage. Then you don’t need to pay extra money to buy a solid toolbox.

- 【Reset ABS/SRS/Transmission/Engine Lights】 More than an check engine code reader, OBDMATE OM901 obd2 scanner performs comprehensive diagnostics for the 4 most-used systems (ABS/SRS/Engine/Transmission). It quickly clears fault codes, turns off warning lights, read data stream and auto VIN.
- 【3.5" Handheld Scanner with 4 System Diagnose】 3.5" Super large TFT screen equipped displays an intuitive menu and clear readings of various sensors from ABS, SRS, ECM and TCM
 systems. It arrived with a silicone protective case and hard-shell carrying case, ensuring long-lived durability and drop resistance. The car diagnostic tool is plug-to-play designed, plug it and get diagnosis started without any batteries or updates required.
 - 【One-Click I/M Readines&Full OBD2 Functions】 Press F1 to get an intuitive corloured form about whether various emissions-related systems on the vehicle are operating properly. Help you get smog-check ready quickly. OM901 car scanner supports all essential OBD2 functions you need: read & clear codes, view freeze frame, read I/M readiness, retrieve VIN, live data stream (with graphing display), O2 sensor test, onboard monitoring mode, and EVAP leak test.
- 【Battery Voltage Check&DLC Pin Test】 It allows you to monitor battery health by testing current battery voltage. Plus, this obd2 diagnostic tool features DLC 16-PIN test to check current voltage of every pin.
- 【Automotive Scanner Diagnostic Kit】 The package comes with 1 car scanner, 1 USB-type c cable, 1 hard storage bag and 1 user manual(en). Free to update without any hidden fees. 5 languanges available in setting including English, French, Italian, German and Espanish. Valuable and Portable, making it a great tool kit for car owners, DIY enthusiasts, and professional mechanics.
 systems. It arrived with a silicone protective case and hard-shell carrying case, ensuring long-lived durability and drop resistance. The car diagnostic tool is plug-to-play designed, plug it and get diagnosis started without any batteries or updates required.
- [Diagnose Like a Pro] BlueDriver Pro is a professional OBD2 scanner and diagnostic tool that helps you scan, understand, and clear vehicle trouble codes with confidence. Turn your phone into a powerful car diagnostic scanner—no guesswork, no unnecessary repairs.
- [Read and Clear More Codes Than Ever] Read and clear more codes than basic car code readers. Access enhanced diagnostics for Check Engine, ABS, SRS, Airbag, TPMS, Transmission.
- [Verified Fixes and Real-Time Data] Get unlimited, technician-verified repair reports matched to your VIN, with definitions, causes, and confirmed fixes. Monitor live vehicle data as you drive, view freeze frames, check smog readiness, and analyze Mode 6 test results.
- [Wireless & Bluetooth Enabled] - Say goodbye to wires. BlueDriver connects with Bluetooth via your phone/tablet to a sensor that plugs into your car's OBDII port. Get all of the capabilities of an expensive code reader & scan tool without any annoying wires.
- [Broad Make & Model Coverage] Strong support for GM, Ford, Stellantis (RAM, Jeep, Chrysler), Toyota, Honda, Nissan, Mazda, Subaru, Hyundai, Mercedes-Benz, BMW, and VW.
- ✔️【Professional SRS Reset for 1994-2003 BMW】 Designed specifically for classic BMW models (1994-2003). This B800 scanner reads & clears SRS airbag fault codes, turns off the warning light, and saves you a costly dealer visit. Confirmed compatible with: E36, E46 (EXCEPT 2001 330i), E34, E38, E39, Z3, and X5 (E53). NOT compatible with any BMW built before 1994 or after 2003.
- ✔️【Important: Two Different Connection Ports – Read Before Use】 To avoid “not working” issues, please note: For 1994–2000 BMWs (most E36, E34, Z3, early E39), the SRS diagnostic port is a round 20-pin connector under the hood. You MUST use the included 16-pin to 20-pin adapter cable. For 2000–2003 models (late E46, E39, X5), use the standard OBD-II port inside the cabin. Incorrect connection is the #1 reason for “incompatibility” reports.
- ✔️【Read & Clear Fault Codes in Minutes】 Quickly diagnose why your SRS light is on. The scanner accurately reads fault codes from airbag and seatbelt pretensioner systems. With one button press, clear the codes and reset the SRS warning light in seconds. No expensive dealer tools needed.
- ✔️【User-Friendly for DIYers – No Mechanic Required】 Easy operation with an intuitive button layout: ‘Enter’ to confirm, ‘Scroll’ to navigate. The clear LCD screen shows results instantly. Includes a step-by-step manual (revised for clarity) to guide you through the entire reset process.
- ✔️【Reliable Support with 1-Year Warranty】 We stand behind the quality of our B800 scanner. It comes with a 1-Year Hassle-Free Warranty. If you have any questions or need support, please contact us with your Order ID, and our dedicated team will assist you promptly.
- OBD2 SCANNER FOR ALL SYSTEMS – The INNOVA SD35 is a tablet-based OBD2 scanner designed for advanced diagnostics. Read and clear check engine light, ABS, SRS, and TPMS codes, plus test your car battery and alternator to prevent unexpected failures. Vehicle coverage may vary. Please use Innova’s Coverage Checker to verify compatibility.
- ALL-SYSTEM DIAGNOSTICS & LIVE DATA – Unlike basic code readers, this OBD2 scanner for all vehicles scans engine, transmission, ABS, SRS, and more. Get real-time live data, including RPM, fuel trims, temperature readings, and oxygen sensor performance.
- OBD2 TABLET WITH USER-FRIENDLY INTERFACE – This automotive scan tool features a high-resolution display, making vehicle diagnostics faster and easier.
- ADVANCED TPMS, OIL RESET & SERVICE FUNCTIONS – Perform TPMS sensor checks, oil light reset, and other service resets with ease This professional diagnostic tool provides comprehensive vehicle maintenance capabilities in one device.
- WIDE VEHICLE COVERAGE (1996 & NEWER CARS & TRUCKS) – This OBD2 scanner Bluetooth tablet is compatible with Toyota, Ford, Honda, Chevrolet, Nissan, Dodge, and more. However, feature coverage may vary. Please use Innova's Coverage Checker to verify coverage.
SEOCONTENT-START
September 2022 Ford Motor Company Ford Customer Service Division P. O. Box 1904 Dearborn, Michigan 48121 1904 * * * IMPORTANT SAFETY RECALL * * * Compliance Recall Notice 22C20 / NHTSA Recall 22V594 2022 Maverick Your Vehicle Identification Number (VIN): This notice is sent to you in accordance with the National Traffic and Motor Vehicle Safety Act. Ford Motor Company has decided that your vehicle, with the VIN shown above, fails to conform to Federal Motor Vehicle Safety Standard (FMVSS) 226 Ejection Mitigation. We apologize for this situation and want to assure you that, with your assistance, we will correct this condition. Our commitment, together with your dealer, is to provide you with the highest level of service and support. What is the issue? The side curtain airbags on your vehicle may not meet the performance requirements of FMVSS 226 Ejection Mitigation for front-row passengers. What is the risk? A vehicle that does not comply with FMVSS 226 increases the risk of injury in a crash. What will Ford and your dealer do? Ford Motor Company is working closely with its suppliers to produce parts for this repair. When parts become available, Ford Motor Company will notify you via mail to schedule a service appointment with your dealer for repairs to be completed free of charge (parts and labor). Parts are anticipated to be available by January 2023. What should you do? When parts are available, Ford Motor Company will send a letter to inform you that parts are available and to contact your dealer to schedule a repair. Ford has not issued instructions to stop driving your vehicle under this compliance recall. When parts are available, you should contact your dealer for an appointment to have your vehicle remedied as soon as practicable. If you do not already have a servicing dealer, you can access ford.com/support for dealer addresses, maps, and driving instructions. If you are still having difficulty getting your vehicle repaired in a reasonable time or without charge, you may write the Administrator, National Highway Traffic Safety Administration, 1200 New Jersey Ave. S.E., Washington, D.C. 20590 or call the toll free Vehicle Safety Hotline at 1-888-327-4236 (TTY: 1-800-424-9153) or go to NHTSA.gov. Reference NHTSA Safety Recall 22V594. Please note: Federal law requires that any vehicle lessor receiving this recall notice must forward a copy of this notice to the lessee within ten days. NOTE: You can receive information about Recalls and Customer Satisfaction Programs through our FordPass App. The app can be downloaded through the App Store or Google Play. In addition there are other features such as reserving parking in certain locations and controlling certain functions on your vehicle (lock or unlock doors, remote start) if it is equipped to allow control. Thank you for your attention to this important matter. Ford Customer Service Division © Copyright 2022 Ford Motor Company 07128 22C20 NP/DTB122C201 1 of 2 A/1/000001/1 771678507969 A/1/000001/1 JOHN A. SAMPLE 123 SAMPLE ST SAMPLE CITY, MI 12345-6789 07128 22C20 NP/DTB122C201 * * * CAMPAÑA DE SEGURIDAD IMPORTANTE * * * Cumplimiento Aviso de Campaña 22C20 / Campaña 22V594 de la NHTSA 2022 Maverick Número de identificación del vehículo (VIN): Este aviso se le envía de acuerdo con la Ley Nacional de Seguridad de Tránsito y Vehículos Motorizados de los EE. UU. Ford Motor Company ha determinado que su vehículo, con el VIN que aparece más arriba, no cumple con la norma federal de seguridad para vehículos de motor (FMVSS) 226 Mitigación de eyección. Lamentamos esta situación y deseamos asegurarle que, con su ayuda, corregiremos el problema. Nuestro compromiso, junto con el de su distribuidor, es ofrecerle servicio y apoyo de alto nivel. ¿Cuál es el problema? Las bolsas de aire laterales de cortina en su vehículo podrían no cumplir con los requisitos de rendimiento de FMVSS 226 Mitigación de eyección para pasajeros de la fila delantera. ¿Qué riesgo existe? Si un vehículo no cumple con FMVSS 226, el riesgo de sufrir lesiones en caso de choque aumenta. ¿Qué medidas adoptarán Ford y su distribuidor? Ford Motor Company colabora estrechamente con sus proveedores para fabricar las piezas para esta reparación. Cuando estas estén disponibles, Ford Motor Company le avisará mediante correo para programar una cita de servicio con su distribuidor y así realizar las reparaciones sin costo alguno (piezas y mano de obra). Se prevé que las piezas estarán disponibles en enero de 2023. ¿Qué debe hacer? Cuando las piezas estén disponibles, Ford Motor Company le enviará una carta para informarle la disponibilidad de estas y solicitarle que se comunique con su distribuidor a fin de programar la reparación. Para esta campaña de conformidad, Ford no ha emitido instrucciones de dejar de manejar el vehículo. Cuando las piezas se encuentren disponibles, deberá ponerse en contacto con su distribuidor a fin de programar una cita para solucionar este problema lo más pronto posible. Si aún no tiene un distribuidor para realizar el servicio, puede acceder a ford.com/support para conocer las direcciones de los distribuidores, ver mapas y obtener las instrucciones para llegar. Si continúa con dificultades para reparar su vehículo en un tiempo razonable o sin cargo, le sugerimos que escriba al Administrador, National Highway Traffic Safety Administration, 1200 New Jersey Ave. S.E., Washington, D.C. 20590 o bien que llame sin cargo a la línea directa de seguridad vehicular al 1-888-327-4236 (TTY: 1-800-424-9153) o visite NHTSA.gov. Referencia: Campaña de seguridad 22V594 de la NHTSA. Tenga presente que: La ley federal exige que los arrendadores de vehículos que reciban este aviso de campaña envíen una copia del mismo al arrendatario en un plazo de diez días. NOTA: Puede recibir información sobre las campañas y los programas de satisfacción del cliente a través de la aplicación FordPass. La aplicación se puede descargar a través de App Store o Google Play. Adicionalmente, existen otras funciones como reserva de estacionamientos en determinados lugares, además de control de ciertas funciones en el vehículo (bloqueo o desbloqueo de puertas, arranque remoto) si así está equipado para permitir el control. Gracias por su atención en este asunto sumamente importante. Ford, División de Servicio al Cliente Septiembre de 2022 Ford Motor Company División de Servicio al Cliente de Ford P. O. Box 1904 Dearborn, Michigan 48121 2 of 2 A/2/000001/1 © Copyright 2022 Ford, División de Servicio al Cliente 771678507969 A/2/000001/1 JOHN A. SAMPLE 123 SAMPLE ST SAMPLE CITY, MI 12345-6789
**************************************************************************************************************
January 2023 Ford Motor Company Ford Customer Service Division P. O. Box 1904 Dearborn, Michigan 48121 1904 * * * IMPORTANT SAFETY RECALL * * * Compliance Recall Notice 22C20 / NHTSA Recall 22V594 2022 Maverick Your Vehicle Identification Number (VIN): This notice is sent to you in accordance with the National Traffic and Motor Vehicle Safety Act. Ford Motor Company has determined that your vehicle, with the VIN shown above, fails to conform to Federal Motor Vehicle Safety Standard (FMVSS) 226 Ejection Mitigation. We apologize for this situation and want to assure you that, with your assistance, we will correct this condition. Our commitment, together with your dealer, is to provide you with the highest level of service and support. What is the issue? The side curtain airbags on your vehicle may not meet the performance requirements of FMVSS 226 Ejection Mitigation for front-row passengers. What is the risk? A vehicle that does not comply with FMVSS 226 increases the risk of injury in a crash. What will Ford and your dealer do? Parts are now available to repair your vehicle. Ford Motor Company has authorized your dealer to replace both side airbag curtains free of charge (parts and labor). How long will it take? The time needed for this repair is less than half a day. However, due to service scheduling requirements, your dealer may need your vehicle for a longer period of time. What should you do? Please call your dealer without delay and request a service date for Recall 22C20. Provide the dealer with your VIN, which is printed near your name at the beginning of this letter. Ford has not issued instructions to stop driving your vehicle under this compliance recall. You should contact your dealer for an appointment to have your vehicle remedied as soon as practicable. If you do not already have a servicing dealer, you can access ford.com/support for dealer addresses, maps, and driving instructions. Ford Motor Company wants you to have this compliance recall completed on your vehicle. The vehicle owner is responsible for making arrangements to have the work completed. Ford Motor Company can deny coverage for any vehicle damage that may result from the failure to have this recall performed on a timely basis. Therefore, please have this recall performed as soon as possible. Please note: Federal law requires that any vehicle lessor receiving this recall notice must forward a copy of this notice to the lessee within ten days. NOTE: You can receive information about Recalls and Customer Satisfaction Programs through our FordPass App. The app can be downloaded through the App Store or Google Play. In addition, there are other features such as reserving parking in certain locations and controlling certain functions on your vehicle (lock or unlock doors, remote start) if it is equipped to allow control. © Copyright 2023 Ford Motor Company 07128 22C20 PA/DTB122C201 1 of 4 A/1/000001/1 771781442112 A/1/000001/1 JOHN A. SAMPLE 123 SAMPLE ST SAMPLE CITY, MI 12345-6789 Have you previously paid for this repair? If you have previously paid for a repair that addresses the issue described in this letter, you still need to have this recall performed to ensure the correct parts and procedures were used. You may be eligible for a refund of previously paid repairs. Refunds will only be provided for repairs related to the side airbag curtains. To verify eligibility and expedite reimbursement, give your paid original receipt to your dealer. Refund requests may also be sent directly to Ford Motor Company. To request your refund from Ford, send the refund request with all required documentation, including your original repair receipt (no photocopies), to Ford Motor Company at P.O. Box 6251, Dearborn, Michigan 48121-6251. Refund requests mailed to this address may take up to 60 days to process. Your original receipt will be returned to you. Detailed information regarding eligibility for Ford’s reimbursement program and documentation requirements may be obtained by contacting the Ford Customer Relationship Center at 1-866-436-7332. What if you no longer own this vehicle? If you no longer own this vehicle and have an address for the current owner, please forward this letter to the new owner. You received this notice because government regulations require that notification be sent to the last known owner of record. Our records are based primarily on state registration and title data, which indicate that you are the current owner. Can we assist you further? If you have difficulties getting your vehicle repaired promptly and without charge, please contact your dealership’s Service Manager for assistance. RETAIL OWNERS: If you have questions or concerns, please contact our Ford Customer Relationship Center at 1-866-436-7332 and one of our representatives will be happy to assist you. If you wish to contact us through the Internet, our address is ford.com/support. For the hearing impaired call 1-800-232-5952 (TDD). Representatives are available Monday through Friday: 8:00 AM – 8:00 PM (Eastern Time). FLEET OWNERS: If you have questions or concerns, please contact our Ford Pro Contact Center at 1-800-34-FLEET, choose Option #1, and one of our representatives will be happy to assist you. If you wish to contact us through the Internet, our address is fleet.ford.com. Representatives are available Monday through Friday: 7:00 AM – 11:00 PM and Saturday 7:00 AM – 5:00 PM (Eastern Time). If you are still having difficulty getting your vehicle repaired in a reasonable time or without charge, you may write the Administrator, National Highway Traffic Safety Administration, 1200 New Jersey Ave. S.E., Washington, D.C. 20590 or call the toll-free Vehicle Safety Hotline at 1-888-327-4236 (TTY: 1-800-424-9153) or go to NHTSA.gov. Reference NHTSA Safety Recall 22V594. Thank you for your attention to this important matter. Ford Customer Service Division © Copyright 2023 Ford Motor Company 07128 22C20 PA/DTB122C201 2 of 4 A/2/000001/1 * * * CAMPAÑA DE SEGURIDAD IMPORTANTE * * * Aviso de Campaña de cumplimiento 22C20 / Campaña 22V594 de la NHTSA 2022 Maverick Número de identificación del vehículo (VIN): Este aviso se le envía de acuerdo con la Ley Nacional de Seguridad de Tránsito y Vehículos Motorizados de los EE. UU. Ford Motor Company ha determinado que su vehículo, con el VIN que aparece más arriba, no cumple con la norma federal de seguridad para vehículos de motor (FMVSS) 226 Mitigación de eyección. Lamentamos esta situación y deseamos asegurarle que, con su ayuda, corregiremos el problema. Nuestro compromiso, junto con el de su distribuidor, es ofrecerle servicio y apoyo de alto nivel. ¿Cuál es el problema? Las bolsas de aire laterales de cortina en su vehículo podrían no cumplir con los requisitos de rendimiento de FMVSS 226 Mitigación de eyección para pasajeros de la fila delantera. ¿Qué riesgo existe? Si un vehículo no cumple con FMVSS 226, el riesgo de sufrir lesiones en caso de choque aumenta. ¿Qué medidas adoptarán Ford y su distribuidor? Las piezas para reparar su vehículo ya se encuentran disponibles. Ford Motor Company ha autorizado a su distribuidor a reemplazar ambas bolsas de aire laterales tipo cortina, sin costo alguno (piezas y mano de obra). ¿Cuánto tiempo tomará? El tiempo necesario para esta reparación será menos de medio día. Sin embargo, debido a los requisitos de planificación de servicio, es posible que su distribuidor tarde un poco más. ¿Qué debe hacer? Llame de inmediato al distribuidor y solicite una cita de servicio para realizar la Campaña 22C20. Proporcione el VIN a su distribuidor, el cual está impreso debajo de sus datos al comienzo de esta carta. Para esta campaña de conformidad, Ford no ha emitido instrucciones de dejar de manejar el vehículo. Deberá ponerse en contacto con su distribuidor a fin de programar una cita para solucionar este problema lo más pronto posible. Si aún no tiene un distribuidor para realizar el servicio, puede acceder a ford.com/support para conocer las direcciones de los distribuidores, ver mapas y obtener las instrucciones para llegar. Ford Motor Company le recomienda realizar esta campaña de cumplimiento en su vehículo. El propietario del vehículo es responsable de realizar los arreglos para llevar a cabo el trabajo. Ford Motor Company puede negar la cobertura en caso de que el vehículo hubiese sufrido daños por no haber realizado la campaña de manera oportuna. Por lo tanto, le solicitamos que realice esta campaña lo antes posible. Tenga presente que: La ley federal exige que los arrendadores de vehículos que reciban este aviso de campaña envíen una copia del mismo al arrendatario en un plazo de diez días. NOTA: Puede recibir información sobre las campañas y los programas de satisfacción del cliente a través de la aplicación FordPass. La aplicación se puede descargar a través de App Store o Google Play. Adicionalmente, existen otras funciones como reserva de estacionamientos en determinados lugares, además de control de ciertas funciones en el vehículo (bloqueo o desbloqueo de puertas, arranque remoto) si así está equipado para permitir el control. 3 of 4 A/3/000001/1 07128 22C20 PA/DTB122C201 Enero de 2023 Ford Motor Company División de Servicio al Cliente de Ford P. O. Box 1904 Dearborn, Michigan 48121 © Copyright 2023 Ford, División de Servicio al Cliente 771781442112 A/3/000001/1 JOHN A. SAMPLE 123 SAMPLE ST SAMPLE CITY, MI 12345-6789 ¿Ha pagado anteriormente por esta reparación? Si usted ha pagado previamente por la reparación que aborda el problema descrito en esta carta, igualmente se le recomienda realizar esta campaña para garantizar que se hayan utilizado las piezas y los procedimientos correctos. Es posible que cumpla con los requisitos para recibir un reembolso por las reparaciones pagadas previamente. Solo se otorgarán reembolsos por reparaciones relacionados con las bolsas de aire laterales tipo cortina. Para comprobar si cumple con los requisitos y agilizar el reembolso, proporcione el recibo de pago original a su distribuidor. También puede enviar las solicitudes de reembolso directamente a Ford Motor Company. Para solicitar un reembolso a Ford, envíe la solicitud con toda la documentación requerida, incluido el recibo original de la reparación (no envíe fotocopias), a Ford Motor Company, P.O. Box 6251, Dearborn, Michigan 48121-6251. El procesamiento de las solicitudes de reembolso enviadas a esta dirección puede tardar hasta 60 días. Su recibo original le será regresado. Comuníquese con el Centro de Relación con Clientes al 1-866-436-7332 para obtener información detallada relacionada con el programa de reembolso de Ford y los requisitos de documentación. ¿Qué pasa si usted ya no es el propietario del vehículo? Si usted ya no es el propietario del vehículo y tiene la dirección del propietario actual, le solicitamos que le reenvíe esta carta. Usted recibió este aviso porque las regulaciones del gobierno exigen el envío de notificaciones al propietario conocido más reciente del registro. Nuestros registros se basan principalmente en datos estatales y de propiedad, que indican que usted es el propietario actual del vehículo. ¿Podemos hacer algo más por usted? Si tiene problemas para reparar de inmediato su vehículo y sin costo alguno, comuníquese con el Gerente de Servicio de su distribuidor para solicitar ayuda. PROPIETARIOS MINORISTAS: Si tiene dudas o preguntas, comuníquese con nuestro Centro de Relación con Clientes Ford al 1-866-436-7332 y uno de nuestros representantes con gusto lo atenderá. Si desea comunicarse con nosotros a través de Internet, nuestra dirección es: ford.com/support. Las personas con problemas de audición pueden llamar al 1-800-232-5952 (TDD). Los representantes atienden de lunes a viernes, de 8:00 a.m. a 8:00 p.m. (hora del este). PROPIETARIOS DE FLOTAS: Si tiene dudas o preguntas, comuníquese con nuestro Centro de contacto de Ford Pro al 1-800-34-FLEET, elija la opción n.° 1 y uno de nuestros representantes con gusto lo atenderá. Si desea comunicarse con nosotros a través de Internet, nuestra dirección es: fleet.ford.com. Los representantes atienden de lunes a viernes de 7:00 a.m. a 11:00 p.m. y sábado de 7:00 a.m. a 5:00 p.m. (hora del este). Si continúa con dificultades para reparar su vehículo en un tiempo razonable o sin cargo, le sugerimos que escriba al Administrador, National Highway Traffic Safety Administration, 1200 New Jersey Ave. S.E., Washington, D.C. 20590 o bien que llame sin cargo a la línea directa de seguridad vehicular al 1-888-327-4236 (TTY: 1-800-424-9153) o visite NHTSA.gov. Referencia: Campaña de seguridad 22V594 de la NHTSA. Gracias por su atención en este asunto sumamente importante. Ford, División de Servicio al Cliente 4 of 4 A/4/000001/1 07128 22C20 PA/DTB122C201 © Copyright 2023 Ford, División de Servicio al Cliente
**************************************************************************************************************
Ó Copyright 2023 Ford Motor Company Stacy L. Balzer Ford Motor Company Operating Director P. O. Box 1904 Service Engineering Operations Dearborn, Michigan 48121 Ford Customer Service Division January 25, 2023 TO: All U.S. Ford and Lincoln Dealers SUBJECT: REF: NEW VEHICLE DEMONSTRATION / DELIVERY HOLD Compliance Recall 22C20 – Supplement #1 Certain 2022 Model Year Maverick Side Airbag Curtain Replacement NEW VEHICLE DEMONSTRATION / DELIVERY HOLD Compliance Recall 22C20 Dated November 9, 2022 New! REASON FOR THIS SUPPLEMENT • Technical Instructions: Repair procedure updated for clarity. • Parts Requirements/Ordering Information: The seed stock program has been lifted. Parts ordering through SSSC is still required. AFFECTED VEHICLES Vehicle Model Year Assembly Plant Build Dates Maverick 2022 Hermosillo Plant February 3, 2021, through July 9, 2022 Affected vehicles are identified in OASIS and FSA VIN Lists. Note: Some vehicles may be in the process of being repaired at the plant. Monitor OASIS before opening an RO and/or beginning a repair. Parts purchased for an FSA can be returned for credit, if required. See the EXCESS STOCK RETURN details in Attachment II for more information. REASON FOR THIS COMPLIANCE RECALL All the affected vehicles may not conform to the requirements specified by Federal Motor Vehicle Safety Standard (FMVSS) No. 226 Ejection Mitigation for front-row passengers, a vehicle that does not comply with FMVSS 226 increases the risk of injury in a crash. SERVICE ACTION Before demonstrating or delivering any new in-stock vehicles involved in this recall, dealers are to replace both side airbag curtains. This service must be performed on all affected vehicles at no charge to the vehicle owner. OWNER NOTIFICATION MAILING SCHEDULE Remedy owner letters are expected to be mailed mid-1st quarter of 2023. PLEASE NOTE: Federal law requires dealers to complete this recall service before a new vehicle is delivered to the buyer or lessee. Violation of this requirement by a dealer could result in a civil penalty of up to $26,315 per vehicle. Correct all vehicles in your new vehicle inventory before delivery. Ó Copyright 2023 Ford Motor Company ATTACHMENTS Attachment I: Administrative Information Attachment II: Labor Allowances and Parts Ordering Information Attachment III: Technical Information Recall Reimbursement Plan QUESTIONS & ASSISTANCE For questions and assistance, contact the Special Service Support Center (SSSC) via the SSSC Web Contact Site. The SSSC Web Contact Site can be accessed through the Professional Technician System (PTS) website using the SSSC link listed at the bottom of the OASIS VIN report screen or listed under the SSSC tab. Sincerely, Stacy L. Balzer Ó Copyright 2023 Ford Motor Company ATTACHMENT I Page 1 of 2 NEW VEHICLE DEMONSTRATION / DELIVERY HOLD Compliance Recall 22C20 – Supplement #1 Certain 2022 Model Year Maverick Side Airbag Curtain Replacement OASIS ACTIVATION OASIS was activated on September 22, 2022 FSA VIN LISTS ACTIVATION FSA VIN Lists were made available through https://web.fsavinlists.dealerconnection.com by September 22, 2022. Owner names and addresses will be available mid-1st quarter of 2023. NOTE: Your FSA VIN Lists may contain owner names and addresses obtained from motor vehicle registration records. The use of such motor vehicle registration data for any purpose other than in connection with this recall is a violation of law in several states, provinces, and countries. Accordingly, you must limit the use of this listing to the follow-up necessary to complete this recall. SOLD VEHICLES • Ford has not issued instructions to stop driving used vehicles under this compliance recall. STOCK VEHICLES • Correct only affected units with sales contracts at this time in new vehicle inventory before delivery. Dealers will be notified when enough parts are in inventory to repair all affected units • Use OASIS to identify any affected vehicles in your used vehicle inventory. DEALER-OPERATED RENTAL VEHICLES The Fixing America’s Surface Transportation (FAST) Act law effective June 2016 prohibits a rental company from selling, renting, or leasing vehicles subject to a safety or compliance recall. Please consult your legal counsel for legal advice. TITLE BRANDED / SALVAGED VEHICLES Affected title-branded and salvaged vehicles are eligible for this recall. OWNER REFUNDS • This safety recall must still be performed, even if the owner has paid for a previous repair. Claiming a refund will not close the recall on the vehicle. • Ford Motor Company is offering a refund for owner-paid repairs covered by this recall if the repair was performed before the date indicated in the reimbursement plan, which is posted with this bulletin. Owners are directed to seek reimbursement through authorized dealers or, at their option, directly through Ford Motor Company at P.O. Box 6251, Dearborn, MI 48121- 6251. • Dealers are also pre-approved to refund owner-paid emergency repairs that were performed away from an authorized servicing dealer after the end date specified in the reimbursement plan. Non-covered repairs, or those judged by Ford to be excessive, will not be reimbursed. • Refunds will only be provided for the cost associated with the side airbag replacement. RENTAL VEHICLES Rental vehicles are not approved for this program. Ó Copyright 2023 Ford Motor Company ATTACHMENT I Page 2 of 2 NEW VEHICLE DEMONSTRATION / DELIVERY HOLD Compliance Recall 22C20 – Supplement #1 Certain 2022 Model Year Maverick Side Airbag Curtain Replacement ADDITIONAL REPAIR (LABOR TIME AND/OR PARTS) Additional repairs identified as necessary to complete the FSA should be managed as follows: • For related damage and access time requirements, refer to the Warranty and Policy Manual / Section 6 – Ford & Lincoln Program Policies / General Information & Special Circumstances for FSA’s / Related Damage. • For vehicles within new vehicle bumper-to-bumper warranty coverage, no SSSC approval is required, although related damage must be on a separate repair line with the “Related Damage” radio button checked. o Ford vehicles – 3 years or 36,000 miles • For vehicles outside new vehicle bumper-to-bumper warranty coverage, submit an Approval Request to the SSSC Web Contact Site before completing the repair. CLAIMS PREPARATION AND SUBMISSION • Claim Entry: Enter claims using Dealer Management System (DMS) or One Warranty Solution (OWS) online. o When entering claims, select claim type 31: Field Service Action. The FSA number 22C20 is the subcode. o For additional claims preparation and submission information, refer to the Recall and Customer Satisfaction Program (CSP) Repairs in the OWS User Guide. • Related Damage/Additional labor and/or parts: Must be claimed as Related Damage on a separate repair line from the FSA with the same claim type and subcode as described in Claim Entry above. IMPORTANT: Click the Related Damage Indicator radio button. • Refunds: Submit refunds on a separate repair line. – Program Code: 22C20 – Misc. Expense: ADMIN – Misc. Expense: REFUND – Misc. Expense: 0.2 Hrs. o Multiple refunds should be submitted on one repair line and the invoice details for each repair should be detailed in the comments section of the claim. Ó Copyright 2023 Ford Motor Company ATTACHMENT II Page 1 of 2 NEW VEHICLE DEMONSTRATION / DELIVERY HOLD Compliance Recall 22C20 – Supplement #1 Certain 2022 Model Year Maverick Side Airbag Curtain Replacement LABOR ALLOWANCES Description Labor Operation Labor Time Replace both side airbag curtains 22C20B 2.0 Hours New! Special Program Part Ordering To place an order for side airbag curtains, submit an open R.O. number and VIN-specific Part Order contact via the SSSC Web Contact Site. Part Number Description Order Quantity Claim Quantity NZ6Z-26042D94-B Curtain Assembly – RH 1 1 NZ6Z-26042D95-B Curtain Assembly – LH 1 1 W710947-S450 Bolt (4 in package) 1 2 Dealers will be notified via a DOES II communication if circumstances warrant a change in part supply strategy and when open ordering resumes. DEALER PRICE For the latest prices, refer to DOES II. PARTS RETENTION, RETURN, & SCRAPPING Follow the provisions of the Warranty and Policy Manual, Section 1 – WARRANTY PARTS RETENTION AND RETURN POLICIES. If a replaced part receives a scrap disposition, the part must be scrapped by all applicable local, state, and federal environmental protection and hazardous material regulations. Federal law prohibits selling motor vehicle parts or components that are under safety, compliance, or emissions recall. EXCESS STOCK RETURN The excess stock returned for credit must have been purchased from Ford Customer Service Division by Policy Procedure Bulletin 4000. Ó Copyright 2023 Ford Motor Company ATTACHMENT II Page 2 of 2 NEW VEHICLE DEMONSTRATION / DELIVERY HOLD Compliance Recall 22C20 – Supplement #1 Certain 2022 Model Year Maverick Side Airbag Curtain Replacement REPLACED FSA PARTS INSPECTION AND SIGN OFF Effective March 1st, 2021 all parts replaced as part of an FSA repair with a repair order open date of March 1st, 2021, or later must be inspected and signed off on the repair order by a member of your dealer fixed operations management team or an employee of the task has been delegated to. If the task is to be delegated to a non-management employee, the employee needs to be someone other than the technician who completed the repair and needs to understand the importance of completing this task consistently and accurately. • All parts replaced as part of an FSA repair should be returned to the parts department following the Warranty Parts Retention and Return Policies. • Inspect the replaced parts to verify the FSA repair was completed. • If the FSA repair is found to be complete, the designated employee signs the repair order line or parts return stamp area (electronic or hand signed) for the FSA repair indicating the parts were inspected and validated to have been replaced. • After the parts have been inspected, they should be handled based on the guidance in the parts status report in the Online Warranty System (Hold, Return, CORE, Scrap, etc.). • This process is subject to review during warranty audits for FSA repairs with a repair order open date of March 1st, 2021, or later. Any eligible FSA claims requiring parts replacement found not to have been inspected and signed off during a warranty audit will be subject to chargeback and consideration for enrollment into the Dealer Incomplete Recall Repair Process. Note: Other approvals (electronic or handwritten) for add-on repair lines, dealer-owned vehicle repairs, and repeat repairs do not qualify as FSA parts inspection approvals. The post-repair FSA parts inspection process (electronic or handwritten) is independent of other warranty approval requirements. The approval by the designated employee implies that the FSA parts were found to be replaced and must be able to be identified on the Repair Order. If multiple FSAs require approval on a single Repair Order, each applicable occurrence will require individual post-repair approval by the designated employee. ATTACHMENT III PAGE 1 OF 20 SAFETY RECALL 22C20-S1 CPR © 2023 FORD MOTOR COMPANY DEARBORN, MICHIGAN 48121 01/2023 CERTAIN 2022 MODEL YEAR MAVERICK VEHICLES — DRIVER AND PASSENGER SIDE CURTAIN AIRBAG REPLACEMENT SERVICE PROCEDURE 1. On both sides remove the A-pillar trim panels. Please follow the Workshop Manual (WSM) procedures in Section 501-05. 2. On both sides remove the B-pillar lower trim panels. Please follow the WSM procedures in Section 501-05. 3. Depower Supplemental restraint System (SRS). Please follow the WSM procedures in Section 501-20B. 4. Position the front seatbelt anchor and pretensioner aside, disconnect the front seatbelt anchor and pretensioner electrical connector and remove the front seatbelt anchor and pretensioner bolt. See Figure 1. • Torque: 40 Nm (30 lb.ft). NOTE: Left Hand (LH) side shown, Right Hand (RH) side similar. STUD FOR MISSING NUT STUD FOR 22454T FIGURE 1 ATTACHMENT III PAGE 2 OF 20 SAFETY RECALL 22C20-S1 CPR © 2023 FORD MOTOR COMPANY DEARBORN, MICHIGAN 48121 01/2023 PLACE COPY HERE PLACE COPY HERE PLACE COPY HERE STUD FOR MISSING NUT STUD FOR MISSING NUT STUD FOR MISSING NUT 22454U FIGURE 2 5. On both sides remove the B-pillar upper trim panel bolt. See Figure 2. • Torque: 9 Nm (80 lb.in). NOTE: LH side shown, RH side similar. STUD FOR E363091 22454V FIGURE 3 6. On both sides release the B-pillar upper trim panel lower clip. See Figure 3. NOTE: LH side shown, RH side similar. ATTACHMENT III PAGE 3 OF 20 SAFETY RECALL 22C20-S1 CPR © 2023 FORD MOTOR COMPANY DEARBORN, MICHIGAN 48121 01/2023 PLACE COPY HERE PLACE COPY HERE PLACE COPY HERE STUD FOR MISSING NUT STUD FOR MISSING NUT STUD FOR MISSING NUT 22454W FIGURE 4 NOTICE: The B-pillar upper trim panel must be positioned downward to allow the upper clips to release correctly. Failure to follow this direction may cause damage to the B-pillar upper trim panel. 7. On both sides slide the B-pillar upper trim panel down, aligning the clips to the slots in the sheet metal. See Figure 4. NOTE: LH side shown, RH side similar. 22454X FIGURE 5 8. On both sides pull outward on the B-pillar upper trim panel, feed the front seatbelt retractor and pretensioner through the opening in the B-pillar upper trim panel and remove the B-pillar upper trim panel. See Figure 5. NOTE: LH side shown, RH side similar. ATTACHMENT III PAGE 4 OF 20 SAFETY RECALL 22C20-S1 CPR © 2023 FORD MOTOR COMPANY DEARBORN, MICHIGAN 48121 01/2023 PLACE COPY HERE PLACE COPY HERE PLACE COPY HERE STUD FOR MISSING NUT STUD FOR MISSING NUT STUD FOR MISSING NUT 22454Q B-SIDE HOOK SLIDER FIGURE 6 9. On both sides adjust the position of the B-pillar Slider downward, pull the slider down to the lower position and engage the B-side hook into the pocket. See Figure 6. NOTE: LH side shown, RH side similar. HEIGHT ADJUSTER 22454R FIGURE 7 10. On both sides pull the height adjuster downward to the lower position and adjust the position of the height adjuster downward. See Figure 7. NOTE: LH side shown, RH side similar. ATTACHMENT III PAGE 5 OF 20 SAFETY RECALL 22C20-S1 CPR © 2023 FORD MOTOR COMPANY DEARBORN, MICHIGAN 48121 01/2023 PLACE COPY HERE PLACE COPY HERE PLACE COPY HERE STUD FOR MISSING NUT STUD FOR MISSING NUT STUD FOR MISSING NUT 22454Z FIGURE 8 11. On the LH side disconnect the headliner wiring harness electrical connector, release the headliner wiring harness from the A-pillar and position the headliner wiring harness aside. See Figure 8. STUD FOR MISSING NUT 22454AA FIGURE 9 12. On both sides position the sun visor bolt cover aside, remove the sun visor bolt, rotate the sun visor end down and rearward to remove from headliner, if equipped disconnect the sun visor electrical connector and remove the sun visor. See Figure 9. NOTE: LH side shown, RH side similar. ATTACHMENT III PAGE 6 OF 20 SAFETY RECALL 22C20-S1 CPR © 2023 FORD MOTOR COMPANY DEARBORN, MICHIGAN 48121 01/2023 PLACE COPY HERE PLACE COPY HERE PLACE COPY HERE STUD FOR MISSING NUT STUD FOR MISSING NUT STUD FOR MISSING NUT 22454BA FIGURE 10 13. On both sides remove the bolt and the sun visor clip. See Figure 10. NOTE: LH side shown, RH side similar. STUD FOR MISSING NUT x4 22454CA FIGURE 11 14. Release the clips and remove the Image Processing Module A (IPMA) cover. See Figure 11. NOTE: Interior rear view mirror removed for clarity. ATTACHMENT III PAGE 7 OF 20 SAFETY RECALL 22C20-S1 CPR © 2023 FORD MOTOR COMPANY DEARBORN, MICHIGAN 48121 01/2023 PLACE COPY HERE PLACE COPY HERE PLACE COPY HERE STUD FOR MISSING NUT STUD FOR MISSING NUT STUD FOR MISSING NUT 22454DA FIGURE 12 15. Disconnect the in-vehicle temperature and humidity sensor electrical connector, the IPMA electrical connector and the IPMA windshield heater grid electrical connector. See Figure 12. STUD FOR MISSING NUT STUD FOR MISSING NUT 22454EA FIGURE 13 16. On the RH side disconnect the headliner wiring harness electrical connector, release the headliner wiring harness from the A-pillar and position the headliner wiring harness aside. See Figure 13. ATTACHMENT III PAGE 8 OF 20 SAFETY RECALL 22C20-S1 CPR © 2023 FORD MOTOR COMPANY DEARBORN, MICHIGAN 48121 01/2023 PLACE COPY HERE PLACE COPY HERE PLACE COPY HERE STUD FOR MISSING NUT STUD FOR MISSING NUT STUD FOR MISSING NUT 22454FA FIGURE 14 17. On the RH side position the front assist handle down, remove the front assist handle retainers and remove the front assist handle. See Figure 14. STUD FOR MISSING NUT 22454GA FIGURE 15 18. On both sides position the rear assist handle down, remove the rear assist handle retainers and remove the rear assist handle. See Figure 15. NOTE: LH side shown, RH side similar. ATTACHMENT III PAGE 9 OF 20 SAFETY RECALL 22C20-S1 CPR © 2023 FORD MOTOR COMPANY DEARBORN, MICHIGAN 48121 01/2023 PLACE COPY HERE PLACE COPY HERE PLACE COPY HERE STUD FOR MISSING NUT STUD FOR MISSING NUT STUD FOR MISSING NUT x2 22454HA FIGURE 16 NOTE: For this procedure only DO NOT remove the C-Pillar upper trim panel. 19. Release the headliner rear clips. See Figure 16. NOTE: C-Pillar upper trim panel removed for clarity. x2 22454JA FIGURE 17 NOTE: The use of an assistant is recommended to support the front of the headliner while the rear is being lowered around the C-Pillar upper trim panel. 20. Lower the headliner. See Figure 17. 21. Remove the driver and passenger side Side Curtain Airbags. Please follow the WSM procedures in Section 501-20B. ATTACHMENT III PAGE 10 OF 20 SAFETY RECALL 22C20-S1 CPR © 2023 FORD MOTOR COMPANY DEARBORN, MICHIGAN 48121 01/2023 PLACE COPY HERE PLACE COPY HERE PLACE COPY HERE STUD FOR MISSING NUT STUD FOR MISSING NUT STUD FOR MISSING NUT FOAM BLOCK 22454A FIGURE 18 22. On both sides of the headliner, remove and discard the foam block located rearward of the B-Pillar upper trim panel. See Figures 18 and 19. NOTE: RH side shown, LH side similar. STUD FOR MISSING NUT STUD FOR MISSING NUT 22454MA REAR OF VEHICLE FIGURE 19 ATTACHMENT III PAGE 11 OF 20 SAFETY RECALL 22C20-S1 CPR © 2023 FORD MOTOR COMPANY DEARBORN, MICHIGAN 48121 01/2023 23. On both sides of the headliner, measure inward 0.11 in (3mm) across the three triangular notches from the edge of the headliner rearward of the B-Pillar upper trim panel and using a suitable tool remove the excess material including the three triangular notches. See Figure 20. NOTE: RH side shown, LH side similar. PLACE COPY HERE PLACE COPY HERE PLACE COPY HERE STUD FOR MISSING NUT STUD FOR MISSING NUT STUD FOR MISSING NUT 22454B FIGURE 20 NOTE: Excess fabric is acceptable and will be covered when the B-Pillar is reinstalled. See Figure 21. STUD FOR MISSING NUT 22454NA EXCESS FABRIC TRIMMED AREA FIGURE 21 ATTACHMENT III PAGE 12 OF 20 SAFETY RECALL 22C20-S1 CPR © 2023 FORD MOTOR COMPANY DEARBORN, MICHIGAN 48121 01/2023 24. On both sides of the front of the headliner, locate the large foam block on the outboard edge of the headliner. Measure from the top of the foam block inward 0.28 in (7mm) and mark the foam block. Using a suitable tool cut from the marked area to the top of the foam block. See Figure 22. NOTE: RH side shown, LH side similar. PLACE COPY HERE PLACE COPY HERE PLACE COPY HERE STUD FOR MISSING NUT STUD FOR MISSING NUT STUD FOR MISSING NUT 0.28 in (7mm) LARGE FOAM BLOCK 22454C LARGE FOAM BLOCK FIGURE 22 25. On both sides of the vehicle remove and discard the A-Pillar bolt. See Figure 23. NOTE: This hole will be used when installing the new side curtain airbags. NOTE: RH side shown, LH side similar. 22454D A-PILLAR BOLT FIGURE 23 ATTACHMENT III PAGE 13 OF 20 SAFETY RECALL 22C20-S1 CPR © 2023 FORD MOTOR COMPANY DEARBORN, MICHIGAN 48121 01/2023 26. Slide the new side curtain airbag rearward, engaging the retainer to the sheet metal, then rotate the side curtain airbag and attach the retainer. See Figure 24. NOTE: LH side shown, RH side similar. PLACE COPY HERE PLACE COPY HERE PLACE COPY HERE STUD FOR MISSING NUT STUD FOR MISSING NUT STUD FOR MISSING NUT 22454K FIGURE 24 27. Install the side curtain airbag rear bolts in the sequence shown. See Figure 25. • Torque: 9 Nm (80 in.lb). NOTE: LH side shown, RH side similar. 22454M FIGURE 25 ATTACHMENT III PAGE 14 OF 20 SAFETY RECALL 22C20-S1 CPR © 2023 FORD MOTOR COMPANY DEARBORN, MICHIGAN 48121 01/2023 28. Attach the new side curtain airbag to the hangers in the sequence shown. See Figure 26. NOTE: LH side shown, RH side similar. PLACE COPY HERE PLACE COPY HERE PLACE COPY HERE STUD FOR MISSING NUT STUD FOR MISSING NUT STUD FOR MISSING NUT 22454E FIGURE 26 29. Using the new 50 torx plus bolt attach the new side curtain airbag lower tether and hand tighten the bolt. See Figure 27. NOTE: RH side shown, LH side similar. STUD FOR 50 TORX PLUS LOWER TETHER 22454F FIGURE 27 ATTACHMENT III PAGE 15 OF 20 SAFETY RECALL 22C20-S1 CPR © 2023 FORD MOTOR COMPANY DEARBORN, MICHIGAN 48121 01/2023 30. Attach the new side curtain airbag hanger. See Figure 28. NOTE: LH side shown, RH side similar. PLACE COPY HERE PLACE COPY HERE PLACE COPY HERE STUD FOR MISSING NUT STUD FOR MISSING NUT STUD FOR MISSING NUT 22454P FIGURE 28 31. Attach the new side curtain airbag hangers. See Figure 29. NOTE: Ensure that the upper tether is not twisted during installation. NOTE: LH side shown, RH side similar. 22454J HANGER UPPER TETHER FIGURE 29 ATTACHMENT III PAGE 16 OF 20 SAFETY RECALL 22C20-S1 CPR © 2023 FORD MOTOR COMPANY DEARBORN, MICHIGAN 48121 01/2023 32. Attach the new side curtain airbag pin-type retainer. See Figure 30. NOTE: RH side shown, LH side similar. PLACE COPY HERE PLACE COPY HERE PLACE COPY HERE STUD FOR MISSING NUT STUD FOR MISSING NUT STUD FOR MISSING NUT PIN-TYPE RETAINER 22454H FIGURE 30 33. Using the new 50 torx plus bolt attach the new side curtain airbag lower tether. See Figure 31. • Torque: 47.5 Nm (35 lb.ft). NOTE: RH side shown, LH side similar. 50 TORX PLUS LOWER TETHER 22454F FIGURE 31 ATTACHMENT III PAGE 17 OF 20 SAFETY RECALL 22C20-S1 CPR © 2023 FORD MOTOR COMPANY DEARBORN, MICHIGAN 48121 01/2023 34. Install the side curtain airbag nuts. See Figure 32. • Torque: 9 Nm (80 in.lb). NOTE: LH side shown, RH side similar. PLACE COPY HERE PLACE COPY HERE PLACE COPY HERE STUD FOR MISSING NUT STUD FOR MISSING NUT STUD FOR MISSING NUT 22454L FIGURE 32 35. Connect the side curtain airbag electrical connector and ensure that the spring-loaded locking tabs have engaged. See Figure 33. NOTE: LH side shown, RH side similar. 22454N FIGURE 33 ATTACHMENT III PAGE 18 OF 20 SAFETY RECALL 22C20-S1 CPR © 2023 FORD MOTOR COMPANY DEARBORN, MICHIGAN 48121 01/2023 NOTE: The use of an assistant is recommended to support the front of the headliner while the rear is being installed around the C-Pillar upper trim panel. 36. Install the headliner by reversing Steps 1-20. NOTE: When installing the B-Pillar upper trim ensure the correct connection between the height adjuster and B-Pillar upper trim. See Figure 34. PLACE COPY HERE PLACE COPY HERE PLACE COPY HERE STUD FOR MISSING NUT STUD FOR MISSING NUT STUD FOR MISSING NUT B-PILLAR TRIM PANEL HEIGHT ADJUSTER HEIGHT ADJUSTER 22454S B-PILLAR TRIM PANEL FIGURE 34 NOTE: When reassembled, ensure that the B-pillar clips are correctly inserted in the T shape slots. An audible “click” must be heard when correctly reassembled. See Figure 35. 22454LA FIGURE 35 ATTACHMENT III PAGE 19 OF 20 SAFETY RECALL 22C20-S1 CPR © 2023 FORD MOTOR COMPANY DEARBORN, MICHIGAN 48121 01/2023 38. Slide the B-Pillar Upper Trim, Up and Down three times to ensure they were properly assembled. See Figure 36. PLACE COPY HERE PLACE COPY HERE PLACE COPY HERE STUD FOR MISSING NUT STUD FOR MISSING NUT STUD FOR MISSING NUT 22454KA FIGURE 36 39. Inspect and position the front and rear door weather strip lips so that they overlap the top of the B-pillar upper trim panel. See Figure 37. STUD FOR MISSING NUT STUD FOR MISSING NUT 22454Y FIGURE 37 ATTACHMENT III PAGE 20 OF 20 SAFETY RECALL 22C20-S1 CPR © 2023 FORD MOTOR COMPANY DEARBORN, MICHIGAN 48121 01/2023 40. Repower the SRS. Please follow the WSM procedures in Section 501-20B. 41. Check the seatbelt system for correct operation. Please follow the WSM procedures in Section 501-20A. IMPORTANT NOTE: Federal law prohibits selling motor vehicle parts or components that are under safety, compliance, or emissions recall. Unless a part is requested to be returned to Ford, all parts replaced under this FSA must be scrapped in accordance with all applicable local, state and federal environmental protection and hazardous material regulations. Refer to the Parts Retention, Return, & Scrapping section of the FSA dealer bulletin for further information. Version 04-23-19 Ford Motor Company Recall Reimbursement Plan for 22C20 Ford and Lincoln’s dealers are in the best position to process reimbursement requests quickly and efficiently. However, federal legislation requires all motor vehicle manufacturers to establish processes through which customers may seek recall reimbursement directly from the manufacturer or from the dealers. Regarding the specific reimbursement plan for Recall # 22C20, owners who have paid for service to remedy the defect or noncompliance must have had that service performed prior to February 10, 2023. After this date, if repairs related to this recall are performed by a non-Ford repair facility in an emergency situation, customers must submit any refund requests through their dealership. As required by this federal regulation, Ford Motor Company submitted the details of its latest General Recall Reimbursement Plan in a letter to the National Highway Traffic Safety Administration (NHTSA) in May 2021. The following is the text of that letter and the Plan: General Recall Reimbursement Plan (As submitted to the NHTSA) Pursuant to the requirements set forth in 49 CFR Part 573 and Part 577 of the Code of Federal Regulations, Ford Motor Company (Ford) is submitting the required information pertaining to our general reimbursement plan for the cost of remedies paid for by vehicle owners before they are notified of a related safety recall. Set forth below is Ford’s general plan to reimburse owners and purchasers for costs incurred for remedies in advance of notification of potential safety-related defects or noncompliance pursuant to Part 573.6 (c)(8)(i). This plan has not changed since our February 20, 2019 submission. Reimbursement Notification Ford’s notice to a vehicle owner in accordance with 49 CFR Part 577 will indicate that Ford is offering a refund if the owner paid to have service to remedy the defect or noncompliance prior to a specified ending date. In accordance with Part 573.13 (c)(2), this ending date will be defined as a minimum of ten calendar days after the date on which Ford mailed the last of its Part 577 notifications to owners and will be indicated in the specific reimbursement plan available to owners for an individual recall. This notice will direct owners to seek eligible reimbursement through authorized dealers or, at their option, directly through Ford at the following address: Ford Motor Company P.O. Box 6251 Dearborn, MI 48121-6251 Ford notes that this rule allows for the identification of a beginning date for reimbursement eligibility. Under the rule, an owner who paid to remedy the defect or noncompliance prior to the identified beginning date would not be eligible for reimbursement. Ford generally has not established such a beginning date for reimbursement eligibility and does not presently anticipate changing this general policy. However, in any case where Ford determines a beginning date is appropriate, Ford will indicate that date in the owner notice. As permitted by 577.11(e), Ford may not include a reimbursement notification when all vehicles are well within the warranty period, subject to approval by the agency. Version 04-23-19 Costs to be Reimbursed For vehicles, reimbursement will not be less than the lesser of: • The amount paid by the owner for the remedy that specifically addressed and was reasonably necessary to correct the defect or noncompliance that is the subject of the recall, or • The cost of parts for the remedy (to be no more than the manufacturer’s list retail price for authorized part(s), plus associated labor at local labor rates, miscellaneous fees (such as disposal of waste) and taxes. For replacement equipment, reimbursement will be the amount paid by the owner for the replacement item (limited by the amount of the retail list price of the defective or noncompliant item that was replaced, plus taxes, where the brand or model purchased by the owner was different than the brand or model that was the subject of the recall). If the item of motor vehicle equipment was repaired, the reimbursement provisions identified above for vehicles will apply. Ford notes that costs incurred by the owner within the period during which Ford’s original or extended warranty would have provided for a free repair of the problem will not be eligible for reimbursement, as provided by Part 573.13 (d)(1). Entities Authorized to Provide Reimbursement Ford will continue to use authorized dealers to reimburse owners under the specific reimbursement plans for a particular recall, and will encourage owners to pursue requests for reimbursement directly through dealers to expedite reimbursement. Ford will also provide a mailing address to which customers can, at their option, send requests for reimbursement directly to Ford, as previously noted. Requests for reimbursement sent directly to Ford may take up to 60 days to process. Whether the owner chooses to pursue reimbursement requests through a dealer or directly through Ford, the owner will be directed to submit the required documentation, upon which reimbursement eligibility will be determined. Required Documentation The reimbursement determination will depend upon the information provided by the customer. Consistent with Part 573.13 (d)(4) the following information must be submitted: • Claimant name and address • Vehicle make, model, and model year • Vehicle identification number (VIN) and, for replacement equipment, a description of such equipment or, for tires, the model, size and TIN (DOT code) • Identification of the recall number (either the Ford recall number or the NHTSA recall number) • Identification of the owner of the recalled vehicle at the time that the pre-notification remedy was obtained • An original receipt for the pre-notification remedy that includes a breakdown of the amount for parts, labor, other costs and taxes, including costs for the replacement item. Where the receipt covers work other than to address the recall or noncompliance, Ford may require the claimant to separately identify costs that are eligible for reimbursement. • If the remedy was obtained during the warranty period, documentation indicating that the warranty was not honored or the warranty repair did not correct the problem related to the recall. Failure to submit all of the above information may result in denial of the reimbursement request. Version 04-23-19 Additional Information The Part 577 required owner notice will provide a toll-free telephone number through which specific information about the reimbursement plan can be requested from Ford. This general reimbursement plan will be incorporated into notifications pursuant to Part 573.6 by reference. Information specific to an individual recall also may be incorporated into the Part 573.6 notification.
**************************************************************************************************************
Ó Copyright 2022 Ford Motor Company David J. Johnson Ford Motor Company Director P. O. Box 1904 Service Engineering Operations Dearborn, Michigan 48121 Ford Customer Service Division September 22, 2022 TO: All U.S. Ford and Lincoln Dealers SUBJECT: NEW VEHICLE DEMONSTRATION / DELIVERY HOLD – Advance Notice Compliance Recall 22C20 Certain 2022 Model Year Maverick Side Airbag Curtain Replacement AFFECTED VEHICLES Vehicle Model Year Assembly Plant Build Dates Maverick 2022 Hermosillo Plant February 3, 2021, through July 9, 2022 Affected vehicles are identified in OASIS and FSA VIN Lists. REASON FOR THIS COMPLIANCE RECALL All the affected vehicles may not conform to the requirements specified by Federal Motor Vehicle Safety Standard (FMVSS) No. 226 Ejection Mitigation for front row passengers, a vehicle that does not comply with FMVSS 226 increases the risk of injury in a crash. SERVICE ACTION DO NOT DEMONSTRATE OR DELIVER any new in-stock vehicles involved in this compliance recall. A complete Dealer Bulletin will be provided to dealers early 1st quarter of 2023 when it is anticipated that parts ordering information and repair instructions will be available to support this compliance recall. IMPORTANT: Dealers should open a Repair Order (RO) only when a full dealer bulletin is published. Opening an RO against an Awareness or Advance Notice will result in warranty rejections against a recall. CUSTOMER NOTIFICATION Owners of record will be notified the week of September 22, 2022, via first-class mail to inform them parts are expected to be available by early 1st quarter of 2023. A full bulletin with repair instructions and parts ordering information will be provided to dealers once service parts are in stock. PLEASE NOTE: Federal law requires dealers to complete this recall service before a new vehicle is delivered to the buyer or lessee. Violation of this requirement by a dealer could result in a civil penalty of up to $21,000 per vehicle. Correct all vehicles in your new vehicle inventory prior to delivery. Ó Copyright 2022 Ford Motor Company QUESTIONS & ASSISTANCE For questions and assistance, contact the Special Service Support Center (SSSC) via the SSSC Web Contact Site. The SSSC Web Contact Site can be accessed through the Professional Technician System (PTS) website using the SSSC link listed at the bottom of the OASIS VIN report screen or listed under the SSSC tab. Sincerely, David J. Johnson
**************************************************************************************************************
OMB Control No.: 2127-0004 Part 573 Safety Recall Report 22V-594 The information contained in this report was submitted pursuant to 49 CFR §573 Manufacturer Name : Ford Motor Company Submission Date : OCT 24, 2022 NHTSA Recall No. : 22V-594 Manufacturer Recall No. : 22C20 Manufacturer Information : Manufacturer Name : Ford Motor Company Address : 330 Town Center Drive Suite 500 Dearborn MI 48126-2738 Company phone : 1-866-436-7332 Population : Number of potentially involved : 64,974 Estimated percentage with defect : 100 % Vehicle Information : Vehicle 1 : 2022-2022 Ford Maverick Vehicle Type : LIGHT VEHICLES Body Style : Power Train : NR Descriptive Information : Affected vehicles have side curtain air bags that may not meet FMVSS 226 requirements. 64,974 2022 model year Maverick vehicles with build dates from February 3, 2021 through July 9, 2022 are affected. These vehicles are not produced in VIN order. Information as to the applicability of this action to specific vehicles can best be obtained by either calling Ford’s toll-free line (1-866-436-7332) or by contacting a local Ford or Lincoln dealer who can obtain specific information regarding the vehicles from the Ford On-line Automotive Service Information System (OASIS) database. Production Dates : FEB 03, 2021 – JUL 09, 2022 VIN Range 1 : Begin : NR End : NR Not sequential Description of Noncompliance : Description of the Noncompliance : Vehicles included in this action were built with side curtain air bags that may not meet the displacement requirements of FMVSS 226 S4.2.1 for the first row lower primary target location. FMVSS 1 : 226 – Ejection mitigation FMVSS 2 : NR Description of the Safety Risk : Vehicles included in this action were built with side curtain air bags that may not meet the displacement requirements of FMVSS 226 S4.2.1 Ejection Mitigation. A vehicle that does not comply with FMVSS 226 increases the risk Part 573 Safety Recall Report 22V-594 Page 2 The information contained in this report was submitted pursuant to 49 CFR §573 of injury in a crash. Description of the Cause : Ford is still investigating the root cause of this issue. Identification of Any Warning that can Occur : None Involved Components : Component Name 1 : Left Air Curtain Component Description : Left Air Curtain Module Assembly Component Part Number : LZ6B-E042D95-AD Component Name 2 : Right Air Curtain Component Description : Right Air Curtain Module Assembly Component Part Number : LZ6B-E042D94-AD Supplier Identification : Component Manufacturer Name : ZF PASSIVE SAFETY US INC Address : CIRCUITO DEL FERROCARRIL #160 GOMEZ PALA GOMEZ PALACIO Foreign States 35024 Country : Mexico Chronology : NHTSA’s Office of Vehicle Safety Compliance contacted Ford on June 29, 2022, regarding the results of their FMVSS 226 compliance audit on the 2022 model year Maverick. The displacement results for the front lower primary target was 111.9 mm which exceeds the federal regulation of 100 mm. Ford’s certification test from December 2020 indicates a displacement of 82.5 – 88.4 mm which meets the regulation of 100 mm and the Ford Acceptance Criteria (FAC) of 93.1 m. Ford’s investigation included analyzing raw data from the NHTSA test vehicle and comparing it to the raw data from the Ford certification test vehicle. Ford’s analysis of all the NHTSA test data has not identified an explanation for the total difference in performance between the NHTSA test vehicle and the Ford certification test vehicle. Part 573 Safety Recall Report 22V-594 Page 3 The information contained in this report was submitted pursuant to 49 CFR §573 In July 2022, Ford conducted FMVSS 226 certification testing, including the front lower primary target, on a 2022 model year Maverick equipped with new current batch side curtain air bags from the assembly plant. The displacement results of three samples tested at the front lower primary target were between 102 and 107.3 mm. The data from this recent test was compared to the data in Ford’s certification test from December 2020 and there were no root causes identified to explain the difference in performance. The root cause analysis is still under investigation. A Stop Ship was issued at Ford’s Hermosillo Assembly Plant (HSAP) on July 12, 2022. Throughout this investigation, Ford and NHTSA discussed daily the status of Ford’s testing, test results, and conclusions. On August 1, 2022, Ford’s Field Review Committee reviewed the concern and approved a field action. Ford is not aware of any accidents or injuries relating to this condition. October 20, 2022 Update: Ford revised the owner notification dates for parts availability. Description of Remedy : Description of Remedy Program : Owners will be notified by mail and instructed to take their vehicle to a Ford or Lincoln dealer for replacement of the left and right side curtain air bag modules with a new design. There will be no charge for this service. Ford provided the general reimbursement plan for the cost of remedies paid for by vehicle owners prior to notification of a safety recall in May 2022. The ending date for reimbursement eligibility is estimated to be October 7, 2022. Ford will forward a copy of the notification letters to dealers to the agency when available. How Remedy Component Differs from Recalled Component : The remedy air curtains will enable the vehicle to meet all FMVSS 226 Ejection Mitigation requirements. Part numbers for the replacement side curtain air bag modules have not been created yet. Identify How/When Recall Condition was Corrected in Production : The new production air curtains will enable the vehicle to meet all FMVSS 226 Ejection Mitigation requirements. Recall Schedule : Description of Recall Schedule : Notification to dealers is expected to occur on September 22, 2022. Part 573 Safety Recall Report 22V-594 Page 4 The information contained in this report was submitted pursuant to 49 CFR §573 Mailing of owner notification letters is expected to begin September 22, 2022 and is expected to be completed by September 28, 2022 instructing customers to take their vehicle to a Ford or Lincoln dealer to have the side curtain air bag modules replaced. October 20, 2022 Update: Mailing of owner notification letters were mailed on September 28, 2022 advising customers that parts are anticipated to be available January 2023. Mailing of owner notification letters instructing customers to take their vehicle to a Ford dealer is expected to be completed in January 2023. Planned Dealer Notification Date : SEP 22, 2022 – SEP 22, 2022 Planned Owner Notification Date : SEP 22, 2022 – SEP 28, 2022 * NR – Not Reported
**************************************************************************************************************
OMB Control No.: 2127-0004 Part 573 Safety Recall Report 22V-594 The information contained in this report was submitted pursuant to 49 CFR §573 Manufacturer Name : Ford Motor Company Submission Date : AUG 08, 2022 NHTSA Recall No. : 22V-594 Manufacturer Recall No. : 22C20 Manufacturer Information : Manufacturer Name : Ford Motor Company Address : 330 Town Center Drive Suite 500 Dearborn MI 48126-2738 Company phone : 1-866-436-7332 Population : Number of potentially involved : 64,974 Estimated percentage with defect : 100 % Vehicle Information : Vehicle 1 : 2022-2022 Ford Maverick Vehicle Type : LIGHT VEHICLES Body Style : Power Train : NR Descriptive Information : Affected vehicles have side curtain air bags that may not meet FMVSS 226 requirements. 64,974 2022 model year Maverick vehicles with build dates from February 3, 2021 through July 9, 2022 are affected. These vehicles are not produced in VIN order. Information as to the applicability of this action to specific vehicles can best be obtained by either calling Ford’s toll-free line (1-866-436-7332) or by contacting a local Ford or Lincoln dealer who can obtain specific information regarding the vehicles from the Ford On-line Automotive Service Information System (OASIS) database. Production Dates : FEB 03, 2021 – JUL 09, 2022 VIN Range 1 : Begin : NR End : NR Not sequential Description of Noncompliance : Description of the Noncompliance : Vehicles included in this action were built with side curtain air bags that may not meet the displacement requirements of FMVSS 226 S4.2.1 for the first row lower primary target location. FMVSS 1 : 226 – Ejection mitigation FMVSS 2 : NR Description of the Safety Risk : Vehicles included in this action were built with side curtain air bags that may not meet the displacement requirements of FMVSS 226 S4.2.1 Ejection Mitigation. A vehicle that does not comply with FMVSS 226 increases the risk Part 573 Safety Recall Report 22V-594 Page 2 The information contained in this report was submitted pursuant to 49 CFR §573 of injury in a crash. Description of the Cause : Ford is still investigating the root cause of this issue. Identification of Any Warning that can Occur : None Involved Components : Component Name 1 : Left Air Curtain Component Description : Left Air Curtain Module Assembly Component Part Number : LZ6B-E042D95-AD Component Name 2 : Right Air Curtain Component Description : Right Air Curtain Module Assembly Component Part Number : LZ6B-E042D94-AD Supplier Identification : Component Manufacturer Name : ZF PASSIVE SAFETY US INC Address : CIRCUITO DEL FERROCARRIL #160 GOMEZ PALA GOMEZ PALACIO Foreign States 35024 Country : Mexico Chronology : NHTSA’s Office of Vehicle Safety Compliance contacted Ford on June 29, 2022, regarding the results of their FMVSS 226 compliance audit on the 2022 model year Maverick. The displacement results for the front lower primary target was 111.9 mm which exceeds the federal regulation of 100 mm. Ford’s certification test from December 2020 indicates a displacement of 82.5 – 88.4 mm which meets the regulation of 100 mm and the Ford Acceptance Criteria (FAC) of 93.1 m. Ford’s investigation included analyzing raw data from the NHTSA test vehicle and comparing it to the raw data from the Ford certification test vehicle. Ford’s analysis of all the NHTSA test data has not identified an explanation for the total difference in performance between the NHTSA test vehicle and the Ford certification test vehicle. Part 573 Safety Recall Report 22V-594 Page 3 The information contained in this report was submitted pursuant to 49 CFR §573 In July 2022, Ford conducted FMVSS 226 certification testing, including the front lower primary target, on a 2022 model year Maverick equipped with new current batch side curtain air bags from the assembly plant. The displacement results of three samples tested at the front lower primary target were between 102 and 107.3 mm. The data from this recent test was compared to the data in Ford’s certification test from December 2020 and there were no root causes identified to explain the difference in performance. The root cause analysis is still under investigation. A Stop Ship was issued at Ford’s Hermosillo Assembly Plant (HSAP) on July 12, 2022. Throughout this investigation, Ford and NHTSA discussed daily the status of Ford’s testing, test results, and conclusions. On August 1, 2022, Ford’s Field Review Committee reviewed the concern and approved a field action. Ford is not aware of any accidents or injuries relating to this condition. Description of Remedy : Description of Remedy Program : Owners will be notified by mail and instructed to take their vehicle to a Ford or Lincoln dealer for replacement of the left and right side curtain air bag modules with a new design. There will be no charge for this service. Ford provided the general reimbursement plan for the cost of remedies paid for by vehicle owners prior to notification of a safety recall in May 2022. The ending date for reimbursement eligibility is estimated to be October 7, 2022. Ford will forward a copy of the notification letters to dealers to the agency when available. How Remedy Component Differs from Recalled Component : The remedy air curtains will enable the vehicle to meet all FMVSS 226 Ejection Mitigation requirements. Part numbers for the replacement side curtain air bag modules have not been created yet. Identify How/When Recall Condition was Corrected in Production : The new production air curtains will enable the vehicle to meet all FMVSS 226 Ejection Mitigation requirements. Recall Schedule : Description of Recall Schedule : Notification to dealers is expected to occur on September 22, 2022. Mailing of owner notification letters is expected to begin September 22, 2022 and is expected to be completed by September 28, 2022 instructing Part 573 Safety Recall Report 22V-594 Page 4 The information contained in this report was submitted pursuant to 49 CFR §573 customers to take their vehicle to a Ford or Lincoln dealer to have the brake linings replaced. Planned Dealer Notification Date : SEP 22, 2022 – SEP 22, 2022 Planned Owner Notification Date : SEP 22, 2022 – SEP 28, 2022 * NR – Not Reported
**************************************************************************************************************
OMB Control No.: 2127-0004 Part 573 Safety Recall Report 22V-594 The information contained in this report was submitted pursuant to 49 CFR §573 Manufacturer Name : Ford Motor Company Submission Date : AUG 09, 2022 NHTSA Recall No. : 22V-594 Manufacturer Recall No. : 22C20 Manufacturer Information : Manufacturer Name : Ford Motor Company Address : 330 Town Center Drive Suite 500 Dearborn MI 48126-2738 Company phone : 1-866-436-7332 Population : Number of potentially involved : 64,974 Estimated percentage with defect : 100 % Vehicle Information : Vehicle 1 : 2022-2022 Ford Maverick Vehicle Type : LIGHT VEHICLES Body Style : Power Train : NR Descriptive Information : Affected vehicles have side curtain air bags that may not meet FMVSS 226 requirements. 64,974 2022 model year Maverick vehicles with build dates from February 3, 2021 through July 9, 2022 are affected. These vehicles are not produced in VIN order. Information as to the applicability of this action to specific vehicles can best be obtained by either calling Ford’s toll-free line (1-866-436-7332) or by contacting a local Ford or Lincoln dealer who can obtain specific information regarding the vehicles from the Ford On-line Automotive Service Information System (OASIS) database. Production Dates : FEB 03, 2021 – JUL 09, 2022 VIN Range 1 : Begin : NR End : NR Not sequential Description of Noncompliance : Description of the Noncompliance : Vehicles included in this action were built with side curtain air bags that may not meet the displacement requirements of FMVSS 226 S4.2.1 for the first row lower primary target location. FMVSS 1 : 226 – Ejection mitigation FMVSS 2 : NR Description of the Safety Risk : Vehicles included in this action were built with side curtain air bags that may not meet the displacement requirements of FMVSS 226 S4.2.1 Ejection Mitigation. A vehicle that does not comply with FMVSS 226 increases the risk Part 573 Safety Recall Report 22V-594 Page 2 The information contained in this report was submitted pursuant to 49 CFR §573 of injury in a crash. Description of the Cause : Ford is still investigating the root cause of this issue. Identification of Any Warning that can Occur : None Involved Components : Component Name 1 : Left Air Curtain Component Description : Left Air Curtain Module Assembly Component Part Number : LZ6B-E042D95-AD Component Name 2 : Right Air Curtain Component Description : Right Air Curtain Module Assembly Component Part Number : LZ6B-E042D94-AD Supplier Identification : Component Manufacturer Name : ZF PASSIVE SAFETY US INC Address : CIRCUITO DEL FERROCARRIL #160 GOMEZ PALA GOMEZ PALACIO Foreign States 35024 Country : Mexico Chronology : NHTSA’s Office of Vehicle Safety Compliance contacted Ford on June 29, 2022, regarding the results of their FMVSS 226 compliance audit on the 2022 model year Maverick. The displacement results for the front lower primary target was 111.9 mm which exceeds the federal regulation of 100 mm. Ford’s certification test from December 2020 indicates a displacement of 82.5 – 88.4 mm which meets the regulation of 100 mm and the Ford Acceptance Criteria (FAC) of 93.1 m. Ford’s investigation included analyzing raw data from the NHTSA test vehicle and comparing it to the raw data from the Ford certification test vehicle. Ford’s analysis of all the NHTSA test data has not identified an explanation for the total difference in performance between the NHTSA test vehicle and the Ford certification test vehicle. Part 573 Safety Recall Report 22V-594 Page 3 The information contained in this report was submitted pursuant to 49 CFR §573 In July 2022, Ford conducted FMVSS 226 certification testing, including the front lower primary target, on a 2022 model year Maverick equipped with new current batch side curtain air bags from the assembly plant. The displacement results of three samples tested at the front lower primary target were between 102 and 107.3 mm. The data from this recent test was compared to the data in Ford’s certification test from December 2020 and there were no root causes identified to explain the difference in performance. The root cause analysis is still under investigation. A Stop Ship was issued at Ford’s Hermosillo Assembly Plant (HSAP) on July 12, 2022. Throughout this investigation, Ford and NHTSA discussed daily the status of Ford’s testing, test results, and conclusions. On August 1, 2022, Ford’s Field Review Committee reviewed the concern and approved a field action. Ford is not aware of any accidents or injuries relating to this condition. Description of Remedy : Description of Remedy Program : Owners will be notified by mail and instructed to take their vehicle to a Ford or Lincoln dealer for replacement of the left and right side curtain air bag modules with a new design. There will be no charge for this service. Ford provided the general reimbursement plan for the cost of remedies paid for by vehicle owners prior to notification of a safety recall in May 2022. The ending date for reimbursement eligibility is estimated to be October 7, 2022. Ford will forward a copy of the notification letters to dealers to the agency when available. How Remedy Component Differs from Recalled Component : The remedy air curtains will enable the vehicle to meet all FMVSS 226 Ejection Mitigation requirements. Part numbers for the replacement side curtain air bag modules have not been created yet. Identify How/When Recall Condition was Corrected in Production : The new production air curtains will enable the vehicle to meet all FMVSS 226 Ejection Mitigation requirements. Recall Schedule : Description of Recall Schedule : Notification to dealers is expected to occur on September 22, 2022. Mailing of owner notification letters is expected to begin September 22, 2022 and is expected to be completed by September 28, 2022 instructing Part 573 Safety Recall Report 22V-594 Page 4 The information contained in this report was submitted pursuant to 49 CFR §573 customers to take their vehicle to a Ford or Lincoln dealer to have the side curtain air bag modules replaced. Planned Dealer Notification Date : SEP 22, 2022 – SEP 22, 2022 Planned Owner Notification Date : SEP 22, 2022 – SEP 28, 2022 * NR – Not Reported
SEOCONTENT-END
This product presentation was made with AAWP plugin.